- 1 - 3 Learn Node
- 4 - Routing / Core Concept
- 5 - Templating / Core Concept
- 6 - Templating Helpers / Core Concept
- 7 - Controllers and MVC Pattern / Core Concept
- 8 - Middleware and Error Handling / Core Concept
- 9 - Creating our Store Model
- 10 - Saving Stores and Using Mixins
- 11 - Using Async Await
- 12 - Flash Messages
- 13 - Querying our Database for Stores
- 14 - Creating an Editing Flow for Stores
- 15 - Saving Lat & Lng for each store
- 16 - Geocoding Data with Google Maps
- 17 - Quick Data Visualization Tip
- 18 - Uploading & Resizing Images with Middleware
- 19 - Routing and Templating Single Store
- 20 - Using Pre-save hooks to make Unique Slugs
- 21 - Custom MongoDB Aggregations
- 22 - Multiple Query Promise with Async Await
- 23 - Creating User Accounts
- 24 - Saving Registered Users to the Database
- 25 - Virtual Fields, Login-Logout Middleware and Protecting Routes
- 26 - Creating a User Account Edit Screen
- 27 - Password Reset Flow
- 28 - Sending email with Node.js
- 29 - Locking down App with User Permissions
- 30 - Loading Sample Data
- 31 - JSON endpoints and creating mongodb indexes
- 32 - Creating an Ajax Search Interface
- 33 - Creating a Geospatial Ajax Endpoint
- 34 - Plotting Stores on Custom Google Map
- 35 - Pushing User Data to our API
- 36 - Displaying our Hearted Stores
- 37 - Adding Reviews Data Model
- 38 - Advanced Relationship Population - Displaying our Reviews
- 39 - Advanced Aggregation
- 40 - Implementing Pagination
- 41- Deployment Setup
- 42 - Deploying to Now
- 43 - Deploying to Heroku
- 44 - Deploying to Digital Ocean2
1 - 3 Learn Node
NTS:
directory: repo/../../assets/Learn-Node
videos: /Movies/../../assets/Learn-Node
Pug is the template engine we are using to generate the HTML.
Error: exception in initAndListen: NonExistentPath: Data directory /data/db not found., terminating
Express - minimalist, unopinionated web framework for Node.js
Environmental variables (where you store your sensitive stuff)
npm assets is for web pack to compile sass and css not for node
4 - Routing / Core Concept
Import express
Grab the router from express
Const router = express.Router()
Then you define your routes (in index.js for this course).
In app.js we have:
// After allllll that above middleware, we finally handle our own routes!
app.use(‘/‘, routes);
However you can have multiple route handlers (such as for admin. )
app.use(‘/admin‘, adminRoutes);
How it works: You get the url and then you have a callback function that will run whenever someone visits that specific url. It gives you three things:
Router
router.get(‘/‘, (req, res) => {
  res.send(‘Hey! It works!’);
});request: which is an object full of information that is coming in.
response: object full of methods for sending data back to the user.
next: third value which we will review in our middleware file because it’s possible you don’t wanna send data back at the route but you want to pass it off to somebody else.
When you console.log in node, you see it in there terminal.
One of the methods we can use to send data:
res.send(“hey”);
res.json
We can also use it to send JSON back.
Never send data more than once or you will get an error that says can’t set headers after they are sent.
We can also pull in data from the url.
Lets say there are url parameters like…
localhost:777/?name=wes&age=100
How to get the data that is in the url? That is part of the request!
You can access the url params like so:
res.send(req.query.name);
Or, you can just return the JSON from the query like so:
res.json(req.query)
The reason we have the query property on the request, is because if we head back to app.js, you will see on LINE 27 & 28:
// Takes the raw requests and turns them into usable properties on req.body
app.use(bodyParser.json())
app.use(bodyParser.urlencoded({ extended: true }))
^ this is middleware which before we even hit the routes, express will check the url and check if anyone has posted data from a form element, and it will put all the data in the request so we can easily access it via req.query. Or request.params
router.get('/reverse/:variable’, (req, res)=>{
res.send(‘it works”);
})
To access the :variable, we do:
res.send(req.params.name)
request.body for posted parameters
response.render();
5 - Templating / Core Concept
When we are not dealing with API endpoints is res.render() which will render out a template for us.
This will be about how to use templating language called Pug.
Jade/Pug is our templating language.
App.js line 20 or 21 we have a views folder, and that is where all our pug files live.
// view engine setup
app.set("views", path.join(__dirname, "views")) // this is the folder where we keep our pug files
app.set("view engine", "pug") // we use the engine pug, mustache or EJS work great too
(You can use alternatives to Pug)
res.render() takes two parameters. First, it needs name of the template to render. The second thing is some local variables (some info that it needs)
PUG
How pug works is you don’t write open and closing tags. Instead you just do the open tag that you want, and then the text beside it like so:
p Hello!
you have: tag, space and then all of your elements inside of it If you wish to nest elements, you need to indent it one level:
div
  p Hello!
You can add classes and ids like so:
div.wrapper
	p.hello Hello!
	span#yo Yo!!!
If it’s just a div, you don’t need to specify div. If you leave the element type out it will assume that it is always a div.
We also need to know about attributes… you put them in parenthesis like so:
img(src=“dog.jpg” alt=“dog”) (you can separate the attributes with commas)
If you want to put something on it’s own line without it rendering as an element you use | like so:
h2
  | Hello
  em How are you?
(End pug)
To get info from the request into the “hello” template, you use the second parameter on the render() method.
PUG CONTINUED
In pug, you can reference the variables that were passed in the second param of the render() method.
You interpolate a variable inside of text in pug like #{dog}
If you want to use a variable into an attribute, you do it like in javascript:
img.dog(src=“dog.jpg” alt=`dog ${dog}`)

If you need to make a variable in pug, you can do it using a dash like so:
-const upDog = dog.toUpperCase();

You can run javascript in Pug.
You can reuse parts of website like footers and headers.
You do that by extending templates, and making “layouts”
We want to extend the layout.pug
extends layout

block content
  p Hello
You can also overwrite the layout (default) portions by referencing them in the extends file.
(end pug)
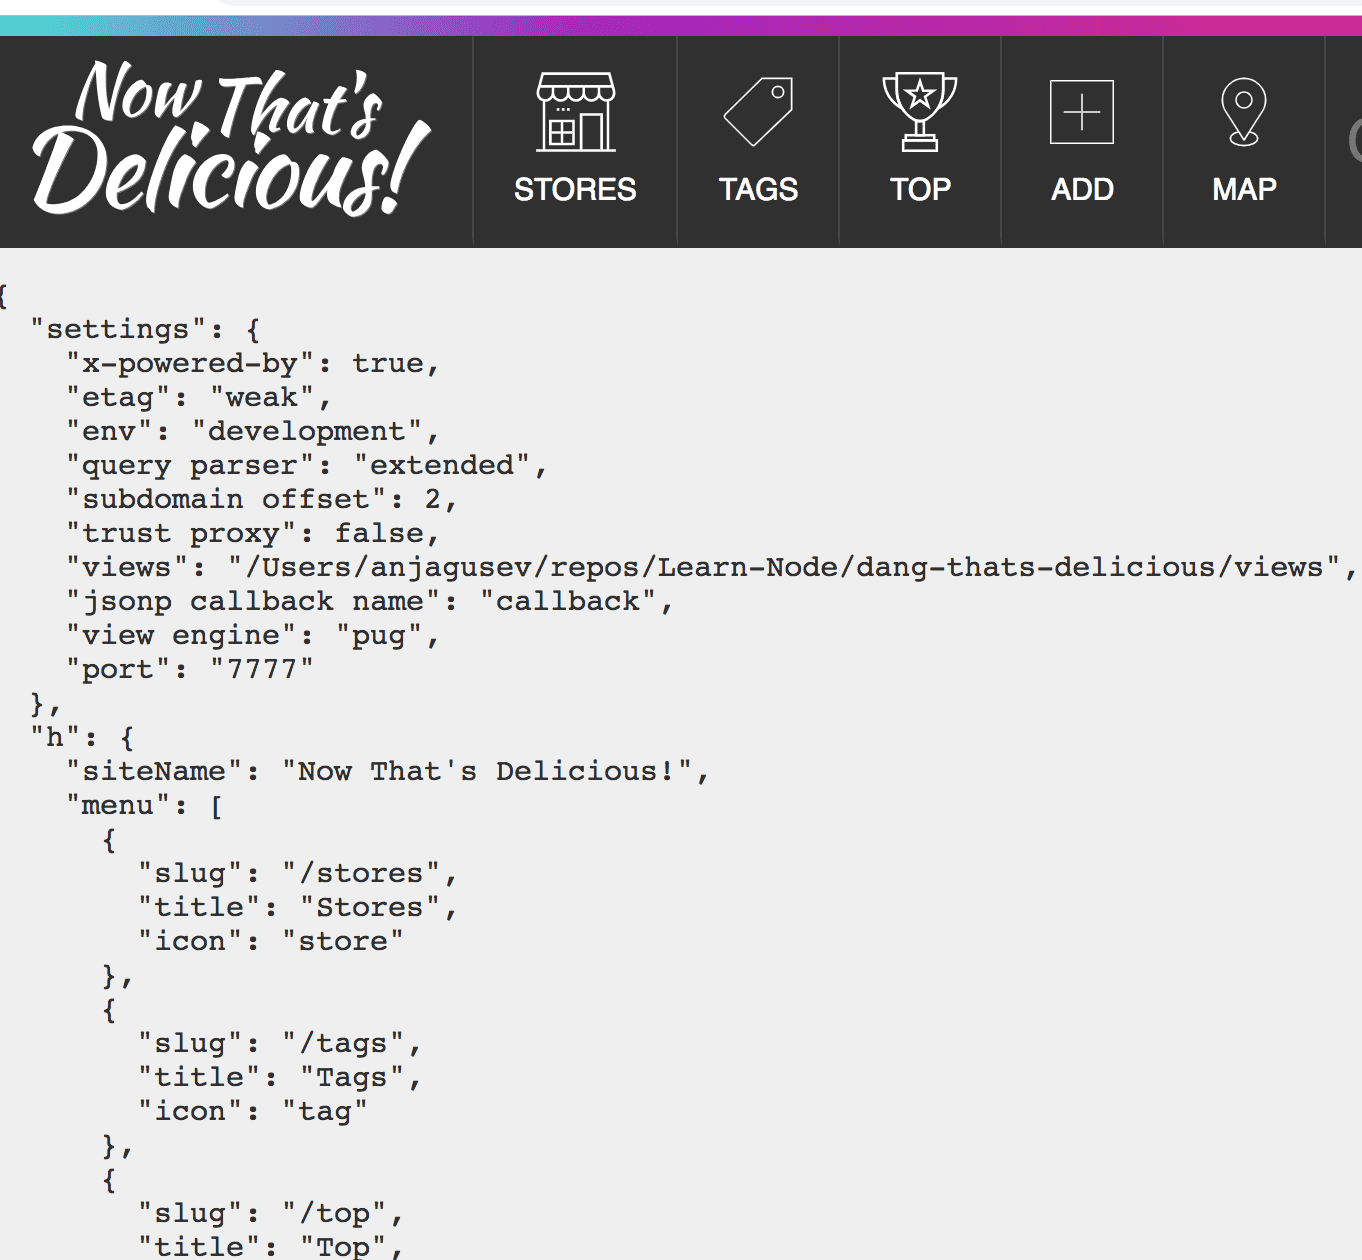
6 - Templating Helpers / Core Concept
Sometimes you need data available in every single request.
Wes creates a helpers.js file and in that file puts any helper libraries or data that is needed in every single template.
exports.menu = [
  { slug: "/stores", title: "Stores", icon: "store" },
  { slug: "/tags", title: "Tags", icon: "tag" },
  { slug: "/top", title: "Top", icon: "top" },
  { slug: "/add", title: "Add", icon: "add" },
  { slug: "/map", title: "Map", icon: "map" },
]
each item in h.menu
li.nav__item
a.nav__link(href=item.slug, class=(currentPath.startsWith(item.slug) ? 'nav__link--active' : ''))
!= h.icon(item.icon)
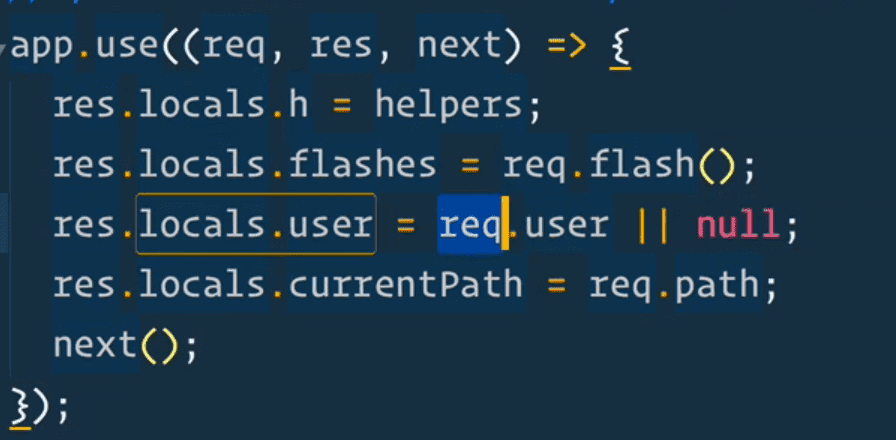
span #{item.title}In middleware we can append variables to all our requests
app.js
// pass variables to our templates + all requests
app.use((req, res, next) => {
  res.locals.h = helpers
  res.locals.flashes = req.flash()
  res.locals.user = req.user || null
  res.locals.currentPath = req.path
  next()
})
You can export arrays, strings ,or entire libraries
Example: exports.moment = require(‘moment’);
7 - Controllers and MVC Pattern / Core Concept
Instead of writing directly to the routes, we factor that code out to it’s own controller.
There is a folder called controllers.
Wes likes to make a controller for every specific area of the website.
On the controller, we have to export all of the different functions that happen.
On our exports variable, (global variable, anything you put on it is importable in another file). Example:
exports.homePage = (req, res) => {
  res.render("index")
}
To use it, import:
const storeController = require(“../controllers/storeController”);
// Do work here
router.get(“/“, storeController.homePage);
8 - Middleware and Error Handling / Core Concept
What is middleware? Stuff that happens between the request and response.

The request goes through an assembly line of middleware and tacks on things
If you are writing middleware you need to pass the next
exports.myMiddleware = (req, res, next) => {
  req.name = "wes"
  next()
}
What next does is it says I am done my work in this middleware and pass it off to the next piece.
How do we use that then? We go to our routes. Instead of
router.get(“/“, storeController.homePage);
You would do
router.get(“/“, storeController.myMiddleware, storeController.homePage);
And since storeController.myMiddleware calls .next() it will pass it to storeController.homePage.
Inside the homePage index method, we can now console log req.name; because we are setting it in the middleware.
Middleware allows us to run some code after the request but before the response happens.
This is an example of route specific middleware. However express also has global middleware, where every single request that goes through the application will run through the middleware before it even gets to your router.
That is generally where we introduce any application wide functions or features or plugins.
Where does that happen? In app.js.
Anywhere you see app.use() it means we are using that global middleware. Even before we get to our routes, we are going to run all those middleware.
app.use(express.static(path.join(__dirname, ‘public’))); -> means that if somebody requests anything from that public folder, it’s going to server that actual file before it even tries to think it’s a route or not.
app.use(bodyParser.json());
app.use(bodyParser.urlencode());
-> anytime anybody submits data via a form tag, you will get the data that was submitted on the request.body and it will all be url encoded.
bodyParser is a package in express.
app.use(expressValidator()) -> validates any email stuff
app.use(cookieParser()): -> by default express doesn’t do anything with cookies, but if you want to set cookies you can. you can use cookieParser middleware which will give you req.cookies. We will need that to work with login sessions.
Sessions will allow us to store data on a visitor, any info you need to go from request to request.
After all that middleware, we finally inject our own routes.
app.use(‘/‘, routes);
Our routes file exports our router which will after handle the individual forward slash routes that are needed.
Error Handlers
After routes, we have more middleware so we can run stuff If something happens when grabbing the route as a safety net… error handlers!
If no route found, we queue up the next middleware.
app.use(errorHandlers.notFound); -> runs when we try to access a route that doesn’t exist.
errorHandlers.js -> own file for errorHandlers.
We have a notFound middleware which will make a new error and set the status to 404, and then call next.
If you pass next() something it will assume what you are passing it is an error.
So we send some error info and pass it along, and the next middleware.
If we are in production, we handle the errors one way and if we are in development we handle it another way.
Wes added a function to error handling to highlight the file names where the errors occur for visibility.
9 - Creating our Store Model
Models are where our data is going to be stored, and before we can create a piece of data we need to describe what that data will look like.
A model can tell what type of data is expected (string ,array), cleanup before the data is saved, creating a slug.
MongoDB can be a loose database, meaning you don’t need to specify what your data will look like ahead of time.
We interface with mongoldb with mongoose package
const mongoose = require(‘mongoose’);
We also need to tell mongoose that the promise to use is the global promise.
mongoose.Promise = global.Promise
What does that mean?
When we get into querying our db, there are a few ways we can wait for the data to get back because it happens asynchronously. You can uses the built in callbacks, you can use external library like bluebird or since we are learning about async await, we are using the built in es6 promise.
We set the mongoose property to be global (sort of like the window in browser).
Don’t put things on the global, it’s generally not what you want.
we import slugs, which allow us to make url friendly names
const slug = require(‘slugs’);
If the main thing you are exporting from a file is going to be importable, then you can put it on modules.exports. for example
modules.export=router
However for storeController.js we are exporting exports.homePage .
When you import a package, is the main thing you import from it a function or are you just importing an object that has many properties on it?
Do all your data normalization as close to the model as possible.
For the model, you can just put the property name and then the type, but you can also pass in an object for the property.
How do we make mongo know about the model?
Go to start.js file. You only need to import it once. It’s using a singleton, once you import it you don’t have to import it in every single file.
The slug property in our Store model is auto generated whenever someone saves.
What we use for that is a pre-save hook in MongoDB. Before someone saves a store, we are going to auto-generate the slug field.
We do that with this code:
storeSchema.pre(‘save’, function(next){
this.slug = slug(this.name);
})
(Don’t use arrow function because we need to reference this, which is the store)
We call .next() because this is pre-save and we want to pass it on to the save.
Right now, the pre-save will run overtime we save but we only want it to run when the name is updated.
Modify method like so:
if(!this.isModified(‘name’)){
next();//skip it
return; //stop the function from running ( you can also do return next(); in one line
}
this.slug=slug(this.name);
next();
});
Finalized Store Model
const storeSchema = new mongoose.Schema(
  {
    name: {
      type: String,
      trim: true,
      required: "Please enter a store name!",
    },
    slug: String,
    description: {
      type: String,
      trim: true,
    },
    tags: [String],
    created: {
      type: Date,
      default: Date.now,
    },
    location: {
      type: {
        type: String,
        default: "Point",
      },
      coordinates: [
        {
          type: Number,
          required: "You must supply coordinates",
        },
      ],
      address: {
        type: String,
        required: "You must supply an address!",
      },
    },
    photo: String,
    author: {
      type: mongoose.Schema.ObjectId,
      ref: "User",
      required: "You must supply an author",
    },
  },
  {
    toJSON: { virtuals: true },
    toObject: { virtuals: true },
  }
)
10 - Saving Stores and Using Mixins
We are going to make the ADD + button on the nav menu functional by adding a route.

Add route:
router.get(“/add”, storeController.addStore);
Add method in storeController to render a template.
exports.addStore = (req, res) => {
  res.render(‘editStore’, { title:'Add Store'});
};
That returns an error because we have not created the associated view. We add a view called editStore.pug and access the title in the template like so #{title} ->
extends layout

block content
  .inner
    h2 #{title}
You could also do h2= title if there was no additional text needed on that element, just the variable.
We need a form, but instead of putting it in editStore.pug we will include the store form in a separate file which we can then pull in, so it’s like a reusable component.
Wes likes to do that with a mixin. A mixin is like a function in javascript, you can pass it some data and it will return to you some HTML that needs to be displayed.
You import the mixing in the view folder include mixins/_storeForm That will make all the mixins defined in that file available as functions inside of the view pug file.
You can have multiple mixins per file, but good practice to keep it one.
To use a mixin, you access it like so: +storeForm()
You can pass info to the mixin like so: +storeForm({name:’Tim Hortons’}) and access it in the mixin.
In pug you can do javascript like so:
- const choices : [‘Wifi’, ‘Open Late’]
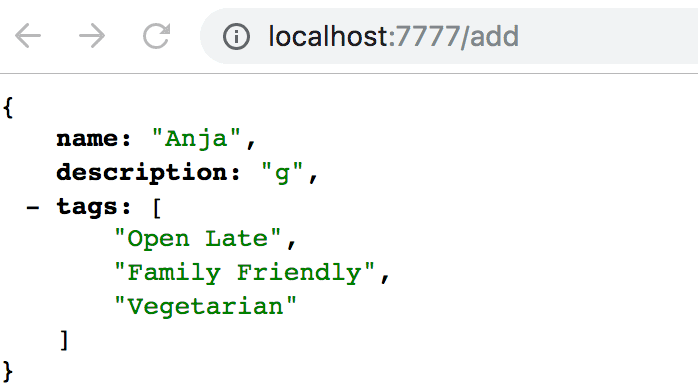
We created this form:
mixin storeForm(store = {})
  form(action="/add" method="POST" enctype="multipart/form-data" class="card")
    label(for="name") Name
    input(type="text" name="name")
    label(for="description") Description
    textarea(name="description")
    - const choices = ['Wifi', 'Open Late', 'Family Friendly', 'Vegetarian', 'Licensed' ]
    ul.tags
      each choice in choices
        .tag.tag__choice
          input(type="checkbox" id=choice value=choice name="tags")
          label(for=choice) #{choice}
    input(type=“submit” value=“Save →” class=“button”)
However when we submit it we get a 404 error because we need to add a POST route: router.post(“/add”, storeController.createStore);
In storeController we need to add a createStore function.
exports.createStore = (req, res) => {
  res.json(req.body)
}
11 - Using Async Await
In storeController, we need access to the database via mongoose so we need to import it, and we also need access to the schema.
For the schema, since we have already imported it once in our start.js file, we can simply reference it off the mongoose variable because it’s a singleton, which means we can import our models once and reference them anywhere in our application.
const Store = mongoose.model("Store");
We use “Store” because we named it that in Store.js where we exported it.
We create the store in Mongo like so: const store = new Store(req.body). It will know only to insert the fields that belong to the model because we are using a strict schema. You save to the db using store.save()
With Mongoose, before you had to have callbacks because JS is asynchronous and you needed to know whether saving was successful or not before redirecting the user. Now we can use Promises, which you can chain together.
store
    .save()
    .then(store => {
      return Store.find();
    })
    .then(stores => {
      res.render(“storeList”, { stores: stores });
    })
    .catch(err => {
      throw Error(err);
    });
Let’s say we only want to console.log() it worked only once the save has finished. The way that we can do that is we can tell javascript to wait until something has completed using async await.
You do that by marking the function as async which lets js know it will possibly have awaits in it. Then go in front of the thing that returns a promise and await it. This means we will not move onto the next line until the save has successfully happened.
exports.createStore = async (req, res) => {
  const store = new Store(req.body);
  await store.save()
  console.log(“It worked!”);
};
To catch errors, wrap entire method in a try catch which is ugly, or we can use composition. Wrap createStore in another function that will catch any errors.
Wes already coded this in errorHandlers.js
exports.catchErrors = fn => {
  return function(req, res, next) {
    return fn(req, res, next).catch(next)
  }
}
This is basically a middleware that we will use which will take in the function, and it will return a function that calls it, and if there is an error it will catch it and call .next().
If any of our routes throw errors, the errorHandler will catch the error and call Next and say something happened so we cannot use the route and we will pass it along the middleware chain (not found, validation error, or show the dev errors or production errors).
If you do not wrap async await in try catch you need to wrap it in catchErrors function.
We need to go to our routes and wrap createStore in the errorHandler method because it is using async await, using composition (wrapping one function in another function).
Import {catchErrors} into routes and wrap createStore like so: router.post(“/add”, catchErrors(storeController.createStore));
12 - Flash Messages
I don’t want to redirect them to a page, I just want to tell them something. But next time they load a page, I want to send them a bit of information.
The user can refresh the page to remove it or close it to dismiss it.
To create a flash you do: req.flash();
We have flash available because we imported the flash middleware.
Flash takes two things:
- type of slash (success, error, warning, you can make up your own).
- Message
req.flash(
    “success”,
    `Successfully Created ${store.name}. Care to leave a review?`
  );
If you load them like:
exports.homePage = (req, res) => {
  console.log(req.name)
  req.flash("error", "Something happened")
  req.flash("info", "Something happened")
  req.flash("warning", "Something happened")
  req.flash("success", "Something happened")
  res.render("index")
}
They won’t appear until you redirect to a new page (or refresh same page) because flashes only show up on the next view.
Flashes is available because in app.js we have the following line:
// pass variables to our templates + all requests
app.use((req, res, next) => {
  res.locals.h = helpers
  res.locals.flashes = req.flash()
  res.locals.user = req.user || null
  res.locals.currentPath = req.path
  next()
})
Which makes it available in all our templates. In our pug template we have conditional logic to show it:
  block messages
      if locals.flashes
        .inner
          .flash-messages
            - const categories = Object.keys(locals.flashes)
            each category in categories
              each message in flashes[category]
                .flash(class=`flash--${category}`)
                  p.flash__text!= message
                  button.flash__remove(onClick=“this.parentElement.remove()”) ×
To dump data in our layout to view locals do the following: pre= h.dump(locals) (from helpers file).
p.flash__text!= message this parses the HTML in the string, if you just did p.flash__text= message it would display the html like <p>Test</p>
They allow us to show information on the page, we use middleware to pass those values to our locals and then in our layout we check if there are any flashes and we show those on the page.
Now instead of redirect to the homepage after a new store is created, we are going to redirect to the newly created store by doing:
res.redirect(`/store/${store.slug}`)But in order to access the slug property, we need to refactor the save like so:
const store = await (new Store(req.body)).save();
This will make the generated property (slug) available to us for the redirect.
exports.createStore = async (req, res) => {
  const store = await new Store(req.body).save()
  req.flash(
    "success",
    `Successfully Created ${store.name}. Care to leave a review?`
  )
  res.redirect(`/store/${store.slug}`)
}
13 - Querying our Database for Stores
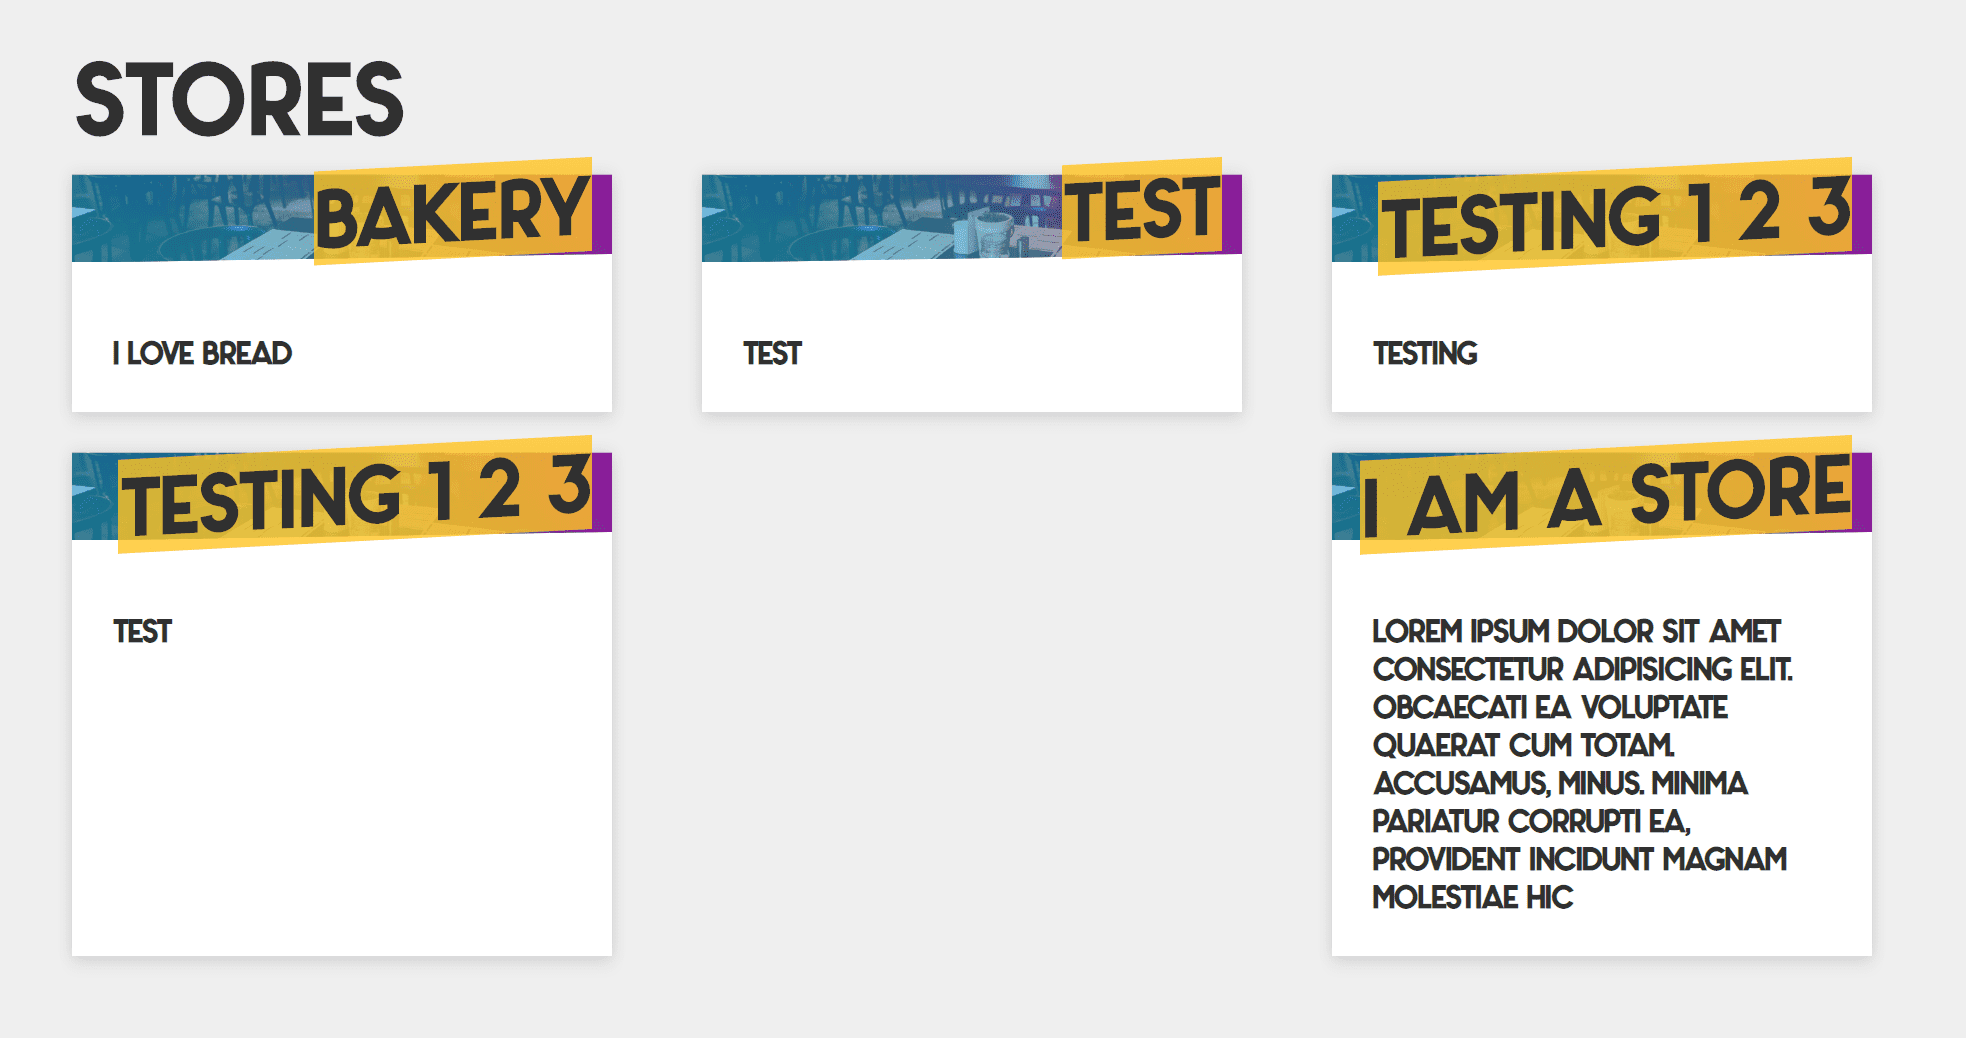
We are going to display the stores in the database on the homepage and on the stores tab. We need a controller method that is going to run on both of those routes.
Modify homepage route and add another route for /stores and wrap them in error handlers since they will be async await.
router.get(“/“, catchErrors(storeController.getStores));
router.get(“/stores”, catchErrors(storeController.getStores));
Now we create another method in storeController.js and make it async await. This method is responsible for returning all the stores:
exports.getStores = async (req, res) => {
  //1. Query database for a list of all stores
  const stores = await Store.find()
  console.log(stores)
  res.render("stores", { title: "Stores", storres })
}
We want to make the stores variable available to our actual template like so: res.render(“stores”, { title: “Stores”, stores: stores });
You can access it now in stores.pug like so: each store in stores
We want to render individual files in a separate mixin however called a “store card” to display each store.
If you want to display the description but limit it to 25 words for example you can do javascript right in pug like so:
p= store.description.split(‘ ‘).slice(0, 25).join(‘ ‘)
14 - Creating an Editing Flow for Stores
We will be creating an edit button with the functionality to edit a store.
The edit button should like to something like a(href=“/store/123/edit”) where 123 is the store id. To achieve this we use:
a(href=`/store/${store._id}/edit`)We want to add an SVG of a pencil for the edit icon. We have a helped class linking to an SVG file that we can use.
TO TELL PUG WE ARE WRITING HTML USE !=
Now we need to hook up a route for this to work. We are going to create a route for that specific url combination.
How do we get the store._id into the route, like a wildcard parameter? We can use this syntax: a colon and then the name of the parameter that is going to be passed in router.get(‘/stores/:id/edit’). When we visit this page we are going to have a variable available to us on our request object that tells us what the actual id of the url is.
Edit store needs to do 3 things:
- Find the store given the ID
- confirm they are the owner of the store
- Render out the edit form so the user can update their store.
On the request object we will have an object called params which will give you any parameters that have come through the URL. Params are anytime your url contains something like :id
We can use the param.id to find the associated store in the db like so:
const store = await Store.findOne({ _id: req.params.id });
We can reuse the edit form view that we created earlier.
res.render(‘editStore’, {title:`Edit ${store.name}`, store})Now we need to populate the edit form with the store information. We pass the storeForm mixin the existing store that we are editing in the editStore.pug view like so: +storeForm(store).
Now within _storeForm.pug add the value of this store in the appropriate inputs like so:
If you try to do on array.includes on something that doesn’t exist it will throw an error. For tags, we need to check the checkbox if that store includes that tag. To do so:
const tags = store.tags || []
    ul.tags
      each choice in choices
        .tag.tag__choice
          input(type=“checkbox” id=choice value=choice name=“tags” checked=(tags.includes(choice)))
-> we are checking whether the “tags” include the current choice in the loop. If so, it will return true. (To use javascript wrap in parenthesis like it is for checked=
Finally we have to handle the updating of the URL, so we don’t create a second store but actually update the existing store. On a branch new store, we want to post to /add but on an editing one we want to post to /add/id
form(action=`/add/${store._id || ''}` method=“POST” class=“card”)Now we have to create a route. router.post(“/add/:id”, catchErrors(storeController.updateStore));
In storeController.js we add a method called updateStore that uses mongo findOneAndUpdate(query, data, options) which takes three parameters, one is the query, the second is the data and third it takes some options.
For this we first pass the _id, then we tell mongo what to update it with, which is req.body which contains all the form fields that got sent over.
const store = Store.findOneAndUpdate({_id:req.params.id}, req.body, { new=true, runValidators:true })new:true returns the new store instead of the old one.
runValidators:true makes sure the model required parameters are checked because it only runs them on initial creation otherwise.
To run it, you have put .exec() to run the query that we have. And then finally we have to await the data.
Next we flash a message:
req.flash( “success”, `Successfully updated <strong>${store.name}</strong>. <a href=“stores/${store.slug}”>View Store → </a>`);And redirect to edit store page/.
Find and update the store, run the validators, tell them it successfully updated and then redirect them to the edit screen they were just on.
exports.updateStore = async (req, res) => {
  //find and update the store
  const store = await Store.findOneAndUpdate({ _id: req.params.id }, req.body, {
    new: true, //return the new store instead of the old one
    runValidators: true
  }).exec();
  req.flash(
    “success”,
    `Successfully updated <strong>${store.name}</strong>. <a href=“stores/${
      store.slug
    }”>View Store → </a>`
  );
  res.redirect(`/stores/${store._id}/edit`);
  //redirect them to the store and tell them it worked.
};
15 - Saving Lat & Lng for each store
Adding a date property to storeSchema:
created: {
    type: Date,
    default: Date.now
  }
-> using a date object allows you to take advantage of custom queries in mongoldb.
Mongodb has stuff built in for location based things (co-ordinates).
There are many ways to store it, but we are going to do one point (a pin).
We added a few more properties for the store schema:
created: {
type: Date,
default: Date.now
},
location: {
type: {
type: String,
default: "Point"
},
coordinates: [
{
type: Number,
required: "You must supply coordinates"
}
],
address: {
type: String,
required: "You must supply an address!"
}
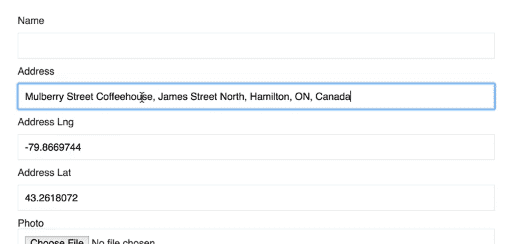
}IN PUG YOU ADD COMMENTS LIKE THIS //- Address, lng and lat
input(type=“text” id=“address” name=“location[address]”)
This will send the information as location.address (nested data) without doing heavy lifting
input(type=“text” id=“address” name=“location[address]” value=store.location.address) -> value will throw an error if there is no location (you can’t read a property of something that doesn’t exist).
To fix that we do: (store.location && store.location.address ) which will only return the address is store.location exists, otherwise it will return false / nothing.
16 - Geocoding Data with Google Maps
 address dropdown does reverse lookup for lat & lng
We are going to add the above functionality via client side javascript.
In the /public/javascript/modules/ directory we will add it, and it is bundled into /public/javascript/modules/delicious-app.js
bling.js A wrapper which helps you grab things instead of writing out document.queryselector all the time.
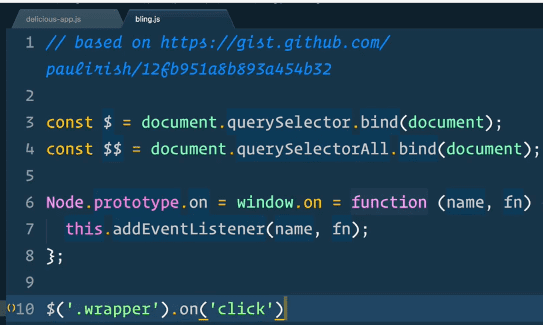
We create new file in /modules directory named autocomplete.js. We can use ES6 here because although node doesn’t have ES6 yet, but we do have es6 and web pack here.
Then we import it in delicious-app.js
import autocomplete from “./modules/autocomplete”;
Then pass the values from the inputs to the autocomplete method like so:
autocomplete($(“#address"), $("#lat"), $("#lng")); in delicious-app.js
Needed to get an API key from google maps and replace it in variables.env
To get lng and lat to populate we need the following code:
 const dropdown = new google.maps.places.Autocomplete(input);
  dropdown.addListener(“place_changed”, () => {
    const place = dropdown.getPlace();
    latInput.value = place.geometry.location.lat();
    lngInput.value = place.geometry.location.lng();
    console.log(place);
  });
We can do input.on instead of input.addEventListener because of the bling library:
  input.on(“keydown”, e => {
    if (e.keyCode == 13) e.preventDefault();
  });
17 - Quick Data Visualization Tip
When you update an address, in mongo it doesn’t save the address as a point.
We need to add that, in updateStore add this line: req.body.location.type = ‘Point’;
18 - Uploading & Resizing Images with Middleware
Add uploading a file to our form. 3 stage process:
- Modify form to accept image uploads
- Add middleware to upload the file and resize it before we create the store
Before we create the store we need to add logic to upload and resize the file.
In _storeForm.pug add enctype to form tag: enctype=“multipart/form-data”
Next we need to use Multer to handle all the fields that are being passed.
In storeController require muster. Next we need to tell Multer where the files will be stored when it’s uploaded and what types of files are allowed.
There are a many options for storage with multer. You can save it to disk, we are going to save it to memory (we don’t want to keep the original uploaded file. We want to resize it and save the resized version to file.
file.mimetype describes which type of file it is (jpg, png) .
In node, for callbacks, when calling next(null, true) the first value that gets passed is an error, and the second value is what needs to get passed along.
const multerOptions = {
  storage: multer.memoryStorage(),
  fileFilter(req, file, next) {
    const isPhoto = file.mimetype.startsWith(“image/“);
    if (isPhoto) {
      next(null, true);
    } else {
      next({ message: “That file type is not allowed!” }, false);
    }
  }
};
Next create another method called upload. multer can handle multiple fields but we are looking for a single field ->
exports.upload = multer(multerOptions).single(“photo”);
Next go to _storeForm.pug and add the photo field.
label(for=“photo”) Photo
      input(type=“file” name=“photo” id=“photo” accept=“image/gif, image/png, image/jpeg”)
      if store.photo
        img(src=`/uploads/${store.photo}` alt=store.name width=200)
The first method (upload) reads it into memory.
Next we import package called jimp to help resize the images. I
We need something to help us ensure the file names are unique so people cannot overwrite. We will use package uuid
Create another method under upload called resize and pass it req , res and next. The reason we pass next is because it’s middleware, we aren’t going to be doing any rendering or sending back to the client we are going to be saving the image , recording what the file name is and passing it to createStore.
Everytime we edit the form, we won’t be uploading an new file, and if that is the case multer won’t pass anything so we need to check for that: if(!req.file){ (multer puts the file on the file property) and call next(); and return();
Next we go to the router, and chain the middleware like so:
router.post(
  “/add”,
  storeController.upload,
  catchErrors(storeController.resize),
  catchErrors(storeController.createStore)
);
We added catch errors to resize because it’s async.
Next we go back to storeController.resize and grab the file time from req.file.mimetype.split(‘/‘)[1]; and create a unique name for the file like so:
req.body.photo = `${uuid.v4()}.${extension}`;Next we resize.
For jimp.read(), you either pass it the file path or a buffer (which is in memory).
exports.resize = async (req, res, next) => {
  //check if there is no new file to resize
  if (!req.file) {
    next(); //skip to the next middleware
    return; // stop the function from running any further
  }
  const extension = req.file.mimetype.split(“/“)[1];
  req.body.photo = `${uuid.v4()}.${extension}`;
  //now we resize
  const photo = await jimp.read(req.file.buffer);
  await photo.resize(800, jimp.AUTO);
  await photo.write(`./public/uploads/${req.body.photo}`);
  //once we have written the photo to our file system, keep going
  next();
};
Next, add the photo to the schema at Store.js with photo: String
Now we need to make the photo editable. We do that by going to our routes.js and doing the same thing we did to the add route like so:
router.post(
  “/add/:id”,
  storeController.upload,
  catchErrors(storeController.resize),
  catchErrors(storeController.updateStore)
);
19 - Routing and Templating Single Store
Creating a page to view an individual store.
First we need to find the store that has that slug, and then next we need to pull in the name of the photo, map, description, list of tags and showing login form eventually and the reviews.
To do this we need to:
-create a new route: router.get(“/store/:slug”, catchErrors(storeController.getStoreBySlug));
Add a controller method that queries the database to find one store matching the slug.
We need to ensure that if there is no store, we do not proceed, because someone could type in a wrong url.
if(!store) return next();
exports.getStoreBySlug = async (req, res, next) => {
  //1. Query database for a store based on slug
  const store = await Store.findOne({ slug: req.params.slug });
  if (!store) return next();
  // res.json(store);
  res.render(“store”, { title: store.name, store });
};
Next we are working on the static map. The google static map takes parameters such as Lat & Lng.

We are going to use a helper method to return the map, which takes in an array as the parameters (lng & lat)
// Making a static map is really long - this is a handy helper function to make one
exports.staticMap = ([lng, lat]) =>
  `https://maps.googleapis.com/maps/api/staticmap?center=${lat},${lng}&zoom=14&size=800x150&key=${
    process.env.MAP_KEY
  }&markers=${lat},${lng}&scale=2`
Which is called like this
img.single__map(src=h.staticMap(store.location.coordinates))
Now we build out the rest of store.pug
20 - Using Pre-save hooks to make Unique Slugs
If you name two stores the same, the pre-save slug will override one of them.
We need to fix the pre-save slug to ensure no overwriting happens.
We need to modify the pre save function to check for that. First change it to async, and then we use a regex to look for store name with - # for example “anja-store”, “anja-store-1”, “anja-store-2”.
Next we need to pass the regex to a query to look up stores.
Within the Store schema, we will do that using this.constructor.find({slugRegEx})
Query the db with the number of stores with that store name, and then generate the slug using storesWithSlug.length + 1
const storesWithSlug = await this.constructor.find({ slug: slugRegEx })
if (storesWithSlug.length) {
  this.slug = `${this.slug}-${storesWithSlug.length + 1}`
}
21 - Custom MongoDB Aggregations
Here we will be building the tags page
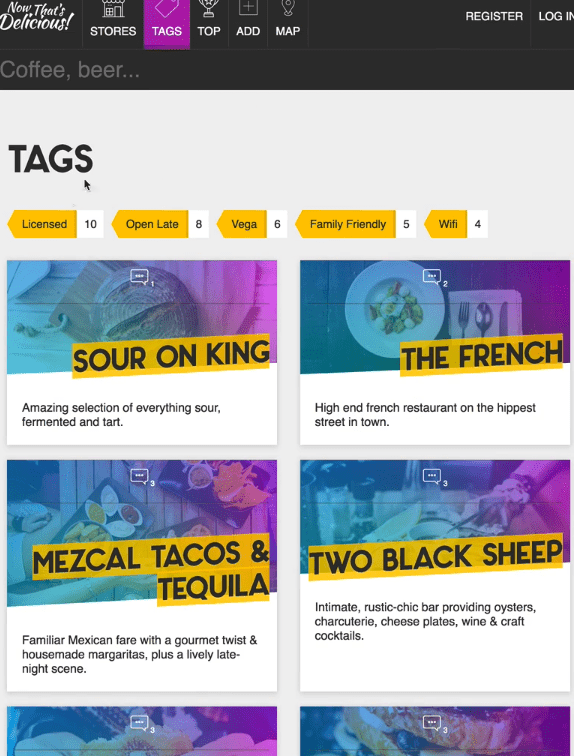
We need a list of all possible tags, and we need to know how many of each store are in those tags. When you go to a tag page, it should filter for all of the stores that have that specific tag.
Create two new routes:
router.get(“/tags”, catchErrors(storeController.getStoresByTag));
router.get(“/tags/:tag”, catchErrors(storeController.getStoresByTag));
You can add a regex / wildcard to say the param after is optional like so:
router.get(“/tags/:tag*?”,
Next, in storeController, we get a list of all of the stores. Instead of Store.find() we can create our own static methods.
Store.getTagsList()
Now we are going to take out store schema and add a method onto it.
storeSchema.statics.getTagsList which is equal to a function, that is bound to our model (don’t use arrow function because we need this)
We are going to unwind our document. Inside of getTagList we will return this.aggregate with an array of options.
Each pipeline operator gets it’s own object.
{$unwind: $tags} the $ of tags lets mongo know this is a field on my document (which I want to unwind).
For unwinding, we get an instance of a store for family friend, and an instance of a store for WiFi. It’s duplicating the content but we don’t care because each store needs one tag per say. We need to group them in our next operator.
We want to group by tags and count them. We also want to sort from most to least.
storeSchema.statics.getTagsList = function() {
  return this.aggregate([
    { $unwind: "$tags" },
    { $group: { _id: "$tags", count: { $sum: 1 } } },
    { $sort: { count: -1 } },
  ])
}
Next create the tag.pug view. Loop over the tags, and highlight the active tag.
We want to highlight the selected tag to be active. To do that, we need to pass the data about what page we are on to our template.
In the getStoresByTag method, we need to grab the tag from the parameter
req.param.tag and pass it to the view in the render method.
Within the view, we want to assign the tag with active if we are on that tags page ->
a.tag__link(href=`/tags/${t._id}` class=(t._id === tag ? tag__link—active : ‘’))Change title to show the tag name if on specific page or just tag if on generic tag page.
22 - Multiple Query Promise with Async Await
In this lesson we are going to show the stores associated with a tag when you click on a tag.
This is the first time we are doing two queries inside of one controller method.
If your queries don’t depend on each other, don’t make them synchronous.
In getStoresByTag, switch from const tags = await Store.getTagsList(); to const tagsPromise = Store.getTagsList();
Next we do another query for stores : const storesPromise = Store.find({ tags: tag})
Now we have two promises but none of the data. Next we are going await from both of the promises.
const result = Promise.all([tagsPromise, storesPromise])
The result returns an array containing the tags and the stores. We can descructure that and pass it along to the view:
 const [tags, stores] = await Promise.all([tagsPromise, storesPromise]);
  res.render(“tag”, { tags, title: “Tags”, tag, stores });
In tag.pug we loop through the stores and display them using the storecard mixin.
 .stores
      each store in stores
        +storeCard(store)
However, now when you go to the tags page, it displays no stores
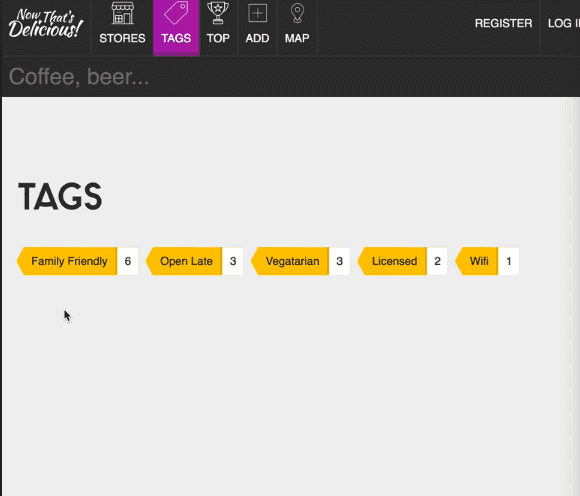
However we want to show all the stores and filter them when you select a tag.
Take out the tag from the storePromise query and create a new variable for the tag
const tagQuery = tag || {$exists:true}
This variable will be equal to the tag or the property called exists true. If there is no tag, it will fallback to the second query (just give me any store that has the tag property on it. It will show every single store that has at least one tag in it).
23 - Creating User Accounts
We are going to create user accounts. A user can create a store belonging to them, comment on other stores, edit their own stores.
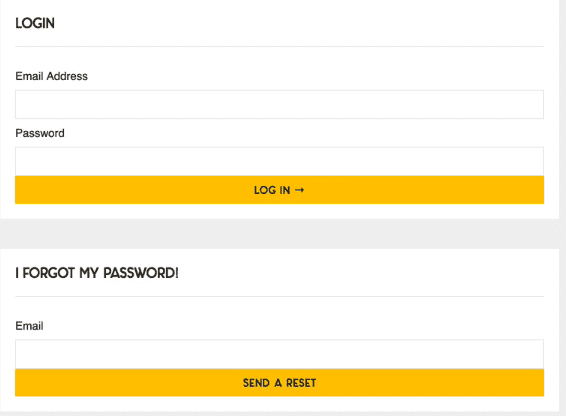
Create the login form first. We create a route
router.get(“/login”, userController.loginForm);
And we will create another controller (userController). And then a View.
We are going to create a mixin for the login form so we can reuse it throughout our application.
//mixins/_loginForm.pug
mixin loginForm()
  form.form(action="/login" method="POST")
    h2 Login
    label(for="email") Email Address
    input(type="email" name="email")
    label(for="password") Password
    input(type="password" name="password")
    input.button(type="submit" value="Log In →")
//views/login.pug
block content
.inner
+loginForm()Now we need to make a User model. Create new file min models called User.js & import mongoose, schema and mongoose promise (mongoose promise is just to suppress a console error).
We import a few more dependencies
const md5 = require(‘md5’);
const validator = require('validator');
const mongodbErrorHandler = require('mongoose-mongodb-errors');
const passportLocalMongoose = require('passport-local-mongoose');
We are exporting the schema as a module
const userSchema = new Schema({});

module.exports = mongoose.model(“User”, userSchema);
In the schema, adding this option lowercase:true, will ensure that a string is always saved as lowercase.
We also want to do custom validation.
  email: {
    type: String,
    unique: true,
    lowercase: true,
    trim: true,
    validate: [validator.isEmail, “Invalid Email Address”],
    required: “Please supply an email address”
  },
You do that in the options by passing validate: in the options and an array of things to check, and then the error message.
We will also implement client side validation however we still need server side validation.
We also want to add password to our schema which we will save a hashed version of. We will be using a package called passport.js. It is a middleware and can be used with any node.js framework that has built in middleware. It takes away the heavy lifting for managing sessions, creating tokens, logging in, interfacing with login providers. Passport.js
Passport has strategies that you can implement to achieve different things.
We don’t need to add any more fields to the schema, we just need to use the passportLocalMongoose library that we imported and it will take care of adding the additional fields to our schema and additional methods to create our new logins.
We add the plugin in the schema and pass it one option, where we say the username field is going to be the email field.
userSchema.plugin(passportLocalMongoose, {usernameField:’email’})
This is saying “here is our schema, can you please add all of the methods and fields that are needed for us to add authentication to our schema and by the way I want to use email as the login field”.
Next we need to use a second plugin called mongodbErrorHandler to handle errors if someone for example tries to use an email that isn’t unique. This plugin will change those errors from ugly to nice versions.
userSchema.plugin(passportLocalMongoose, {usernameField:’email’})
Next we want to move onto posting our data to our login.
We also need a register form. Create a file views/register.pug .
 extends layout

block content
  .inner
    h2
    form.form(action=“/register” method=“POST”)
      h2 Register
      label(form=“name”) Name
      input(type=“text” name=“name”)
      label(for=“email”) Email
      input(type=“email” name=“email”)
      label(for=“password”) Password
      input(type=“password” name=“password”)
      label(for=“password-confirm”) Confirm Password
      input(type=“password-confirm” name=“password-confirm”)
      input.button(type=“submit” value=“Register →”)
Now we need to create the route to post our registration form. When someone posts to the registration form we need to do a few things:
- Validate the registration data
- Validate the user
- Log them in
First we need to validate the data the person is registering with. We try to do that its much as possible on the moddle, but sometimes there is additional checks that need to happen before you start to send the data to the db. In that case, you can do the actual validation in the controller.
In userController we are going to create a bunch of middleware to check that we have done everything correctly.
First we are going to sanitize their name to make sure they haven’t put script tags or anything. req.sanitizeBody(‘name’)
(We can use .sanitizeBody() because in app.js we imported expressValidator from package express-validator) and then in app.js we did app.use(expressValidator()). That adds a bunch of validation methods to every request in the application and when you have a request you can just call the validation methods that live on top of it without importing the library.
Express-validator does a lot more. https://github.com/express-validator/express-validator
Next we need to check for a name property, check that it is not empty and provide an error.
 req.sanitizeBody(“name”);
  req.checkBody(“name”, “You must supply a name!”).notEmpty();
  req.checkBody(“email”, “That email is not valid!”).isEmail();
Next we need to normalize email. Sometimes when people signup, they use a variation of emails like: Wesbos@gmail.com wesbos@gmail.com wes.bos@gmail.com wesbos@googlemail.com wesbos+test@gmail.com
Which are all the same thing. .normalize() will normalize them to wesbos@gmail.com . You can turn the various settings on and off.
We also make sure the password and password-confirm fields are not empty.
Last we check that the confirm password and password match.
Next we need to call the validation and get the errors -> const errors = req.validationErrors().
If something goes wrong, we want to show the errors:
req.flash(“error”, errors.map(err => err.msg));
The errors will contain an array of all the errors and the fields that they are related to.
If something goes wrong we want to re-render the register form but we don’t want to clear everything .
So we re-render the register form, and we have to pass the body, and the flashes along. Normally the flashes get passed along because it’s on the next request, but since all of the validation and rerendering is happening on a single request, we need to explicitly pass the flashes.
exports.validateRegister = (req, res, next) => {
  req.sanitizeBody("name")
  req.checkBody("name", "You must supply a name!").notEmpty()
  req.checkBody("email", "That email is not valid!").isEmail()
  req.sanitizeBody("email").normalizeEmail({
    remove_dots: false,
    remove_extension: false,
    gmail_remove_subaddress: false,
  })
  req.checkBody("password", "Password cannot be blank!").notEmpty()
  req
    .checkBody("password-confirm", "Confirmed Password cannot be blank!")
    .notEmpty()
  req
    .checkBody("password-confirm", "Oops! your passwords do not match")
    .equals(req.body.password)
  const errors = req.validationErrors()
  if (errors) {
    req.flash("error", errors.map(err => err.msg))
    res.render("register", {
      title: "Register",
      body: req.body,
      flashes: req.flash(),
    })
    return // stop the fn from running
  }
  next() //there were no errors!
}
Now we have to hook up the validation method to our router.
router.post(“/register”, userController.validateRegister);
24 - Saving Registered Users to the Database
We need to import the User model into our start.js
require(`./models/User`)Now go to userController and grab model that we imported. const User = mongoose.model(“User”);
Add another middleware to the route:
router.post(“/register”,
userController.validateRegister,
userController.register);
In userController add another method which will be async which will be responsible for saving the user to the db.
create the user: const user = new User({ email: req.body.email, name: req.body.name });
However we don’t save yet. We aren’t going to call .save() we are going to call .register(). .register() is the method that will take the password that we pass it and hash it and save it to our actual database.
Where did .register() come from? In our user model, we imported the passportLocalMongoose plugin. That exposed to us the method called .register() which is going to take care of the registration for us.
To the register method we pass: the user, the password, and then a call back ->
User.register(user, req.body.password, function(err, user) {})We use a callback because the library doesn’t use promises OR you can use the promisify library to take the callback based function and turn it into a promise based function .
How to turn it into promisifyed function. First, make the method that is promisified:
You take promisify and you pass it two things:
- The method that you want to promisify (
User.register) - Because it’s a method and not just a top level function, we need to pass it which object to bind to (
User) … (if you ever call promisify on a method that is on an object, you also have to pass the entire object so it knows where to bind itself to).
Now we have this register method which we can await:
await register(user, req.body.password) -> it is going to take the password the email and the name and it’s not going to store the actual password, it will store the hash in the database.
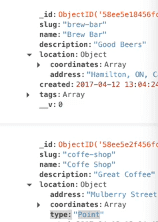
Now you can see the user in the db:

Now we need to log them in automatically.
Next we are going to create another controller called the authcontroller which will handle all of our logging in, passport.js, password reset and email. Anything about being logged in and authenticating.
Next we need to send passport data and it should tell us whether the user should be logged or not, and that is called a strategy in passport (strategy is something that will interface with checking if you are allowed to login)
We are using a local strategy to check if username and password have been sent in correctly.
We are going to create a login middleware using methods from passport. First we pass it the strategy (local)
Passport handles the failure redirect and success redirects.
Next add the login middleware to the register route, and import the authController.
However, before we use any of the passport strategies, we need to configure them in our application. Before local, we need to tell it what to do with the actual users once they have signed in (we are going to put the User object on each request).
Create one more file in the /handlers/ directory called passport.js which will configure our actual passport.
Import passport, mongoose, and User model.
Next we say: passport.use(User.createStrategy()); (we can do that because we used that plugin in our users.js)
Now we have to tell passport what to do with the actual user. We are going to login to passport and then it’s going to say, okay now what information do you want on each request. We want to pass along the actual user object so we can do things like import their avatar and show the stores they have created.
const passport = require(“passport”);
const mongoose = require(“mongoose”);
const User = mongoose.model(“User”);

passport.use(User.createStrategy());

passport.serializeUser(User.serializeUser());
passport.deserializeUser(User.deserializeUser());
We need to take this and import it somewhere in our actual application.
Next we go to app.js and we require the passports handler we just created:
require('./handlers/passport');
Which will invoke the code that lives inside the passport handler.
25 - Virtual Fields, Login-Logout Middleware and Protecting Routes
In this video we are dealing with logging in, logging out, making sure that when a user adds a store that store is related to them.
We are going to start with the logout button.
Add route router.get("/logout", authController.logout);
Add method in authController
exports.logout = (req, res) => {
  req.logout();
  req.flash(“success”, “you are now logged out! 👋”);
  res.redirect(“/“);
};
Next we need to make post login route: router.post(“/login”, authController.login);
Next we have an avatar when a user is logged in.
A gravatar is a globally recognized avatar. Every single time you have a user’s email address, you can drum up the avatar from their email.
We don’t need to add a field for gravatar because we can use a virtual field, which is a field that is generated.
Rather than storing all that data, sometimes your fields can be generated on the fly.
For example if you are storing someones weight in kilograms, you don’t also want to store it in pounds even if you are displaying it like that.
To make a virtual field we add the following to our schema:
userSchema.virtual(‘gravatar’).get(function(){
return [WHatever we want to return here]
});
A gravatar uses a hashing of the email to display an image.
Within the function above, this line of code hashes the email const hash = md5(this.email); . We can use this to access the email because we are within the schema and will have access to that instances’ email.
userSchema.virtual(“gravatar”).get(function() {
  const hash = md5(this.email);
  return `https://gravatar.com/avatar/${hash}?s=200`;
});
Next, no one should be able to create a store without being logged in. In our authControllelr we will make middleware that checks if the user is logged in.
Check if user is authenticated req.isAuthenticated() -> will check with passport .
If authenticated, do next() and return;
If not, flash and error and redirect to the login
Next we add the middleware to our /add get route like so:
router.get("/add", authController.isLoggedIn, storeController.addStore);
Which will prevent anyone from accessing add a store
26 - Creating a User Account Edit Screen
We need to make /account url work. We need to add it to the routes
router.get(“/account”, userController.account);
Next we make a view, with a form to edit the account.
Within the view, we have access to the user object because it is available on every request and we pass it to our locals. In app.js we have :
extends layout

block content
  .inner
    h2 Edit Your Account
    form(action=“/account” method=“POST”)
      label(for=“name”) Name
      input(type=“text” name=“name” value=user.name)
      label(for=“email”) Email Address
      input(type=“email” name=“email” value=user.email)
      input.button(type=“submit” value=“Update My Account”)
We have to make sure they are logged in before they can access the accounts. Add isLoggedIn middleware to the route.
Now we make a route to handle the post of the account form.
router.post(“/account”, catchErrors(userController.updateAccount));
updateAccount is async. First grab the updated values and assign them to an object. Next, update them using mongo method findOneAndUpdate() which takes three parameters, the query, the info to update and then the options.
exports.updateAccount = async (req, res) => {
  const updates = {
    name: req.body.name,
    email: req.body.email
  };
  const user = await User.findOneAndUpdate(
    { _id: req.user._id },
    { $set: updates },
    {
      new: true,
      runValidators: true,
      context: “query”
    }
  );
  req.flash("success", "Updated the profile!");


  res.redirect(‘back’);
};
res.redirect(‘back’); <- will take the user back to wherever they were .
27 - Password Reset Flow
Create reset password mixin named _forgot.pug and import it into login form.
-
Check if there is a user with that email account
-
If so, give them a token with an expiry date to reset their password
-
Those two pieces of email are emailed to them
-
If proper token and unexpired date then they need to reset the password
-
see if user exists
  const user = await User.findOne({ email: req.body.email });
  if (!user) {
    req.flash(“error”, “No account with that email exists”);
    return res.redirect(“/login”);
}- Import built in module crypto
const crypto = require(‘crypto’);
Set reset token and expiry on their account
  `user.resetPasswordToken = crypto.randomBytes(20).toString(“hex”);
`user.resetPasswordExpires = Date.now() + 3600000; //1 hour from now- Fds
- Fads
We need to add the extra fields to our schema (resetPasswordToken, resetPasswordExpires)
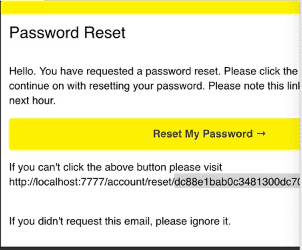
To get the reset url, we need to get the current url using {req.headers.host} like so: http://${reg.headers.host}.account/reset/${user.resetPasswordToken};
Next we have to actually make a route for the password reset link.
router.get(‘/account/reset/:token', catchErrors(authController.reset));
Now we go make the controller method:
//authController.js
exports.reset = async (req, res) => {
  const user = await User.findOne({
    resetPasswordToken: req.param.token,
    resetPasswordExpires: { $gt: Date.now() }
  });
We grab the token from the param and look for a user who has a matching token, and whose token has not expired.
Next, check if there is a user. If not, flash error and redirect to login.
If there is a user, show the reset password form.
Create a view called reset.pug. In the reset form, leave out the action. If you leave out an action on an HTML form, it posts the form to the same url it’s on.
Next we want to create the post route for the reset form.
router.post(“/account/reset/:token”, authController.confirmedPasswords, catchErrors(authController.update))
Next we create the update and confirmedPasswords methods in the authController.
When you need to access a request property that has dashed in it, you need to use square brackets like req.body[‘password-confirm’]
exports.confirmedPasswords = (req, res, next) => {
  if (req.body.password == req.body[password - confirm]) {
    next(); //keep it going
    return;
  }
  req.flash(“error”, “Passwords do not match!”);
  res.redirect(“back”);
};
In the update method, we first check again to make sure the password hasn’t expired.
If it has or the password is invalid, redirect them to the login.
If its valid, we want to set their password. We can use the user.setPassword() method but that isn’t promisified.
Promised version:
const setPassword = promisify(user.setPassword, user)
await setPassword(req.body.password)
Next we have to set the resetPasswordToken and resetPasswordExpires fields to undefined because we no longer need them and that’s how you get rid of fields in mongo.
const setPassword = promisify(user.setPassword, user)
await setPassword(req.body.password)
user.resetPasswordToken = undefined
user.resetPasswordExpires = undefined
const updateUser = await user.save()
await req.login(updatedUser)
req.flash(
  "success",
  "Nice! Your password has been reset. You are now logged in!"
)
res.redirect("/")
28 - Sending email with Node.js
POSTMARK APP?
We are going to use mailtrap.io a service which traps the mail you send so you can see it instead of sending in a dev environment.
Go to variables.env and update the mail username and password.
Next create a new handler called mail.js and we need to import node mailer.
Nodemailer will interface with SMTP or any other transports and it will do the sending of the email for you.
const node mailer = require(‘nodemailer’)
Now we need to create a transport. A transport is the way you interface with different ways of sending emails (SMTP being the most common)
const transport = nodemailer.createTransport({
host:process.env.MAIL_HOST,
port: process.env.MAIL_PORT,
auth:{
  user: process.env.MAIL_USER,
  pass: process.env.MAIL_PASS
}})

transport.sendMail({
from: 'Wes Bos <wesbos@gmail.com>`,
to: `randy@example.com`,
subject: 'Just trying things out!',
html: 'HEy I <strong>love</strong> you',
text: 'Hey I **love you**"
And then you send the email..
To test this we will run it on app start up.
In the bottom of start.js we will temporarily add this code:
require(‘./handlers/mail’)
Clear the console and then save start.js and check mailtrap.io
When someone resets their password we are going to call a method called send.
We want to create the mail options object with from, to, html and text values and then promisify the send method.
exports.send = async options => {
  const mailOptions = {
    from: `ANja Gusev <noreply@anjagusev.com>`,
    to: option.user.email,
    subject: options.subject,
    html: “This will be filled in later”,
    text: “This will also be filled in later”
  };
  const sendMail = promisify(transport.sendMail, transport);
  return sendMail(mailOptions);
};
Next, we want to send the email when someone wants to reset their password. In authController, we have a password reset method (.forgot) where we are returning the reset link in a success message. Remove the reset url from the success message. Import the mail handler we created earlier, and before we show the success message, send the mail like so:
await mail.send({
  user,
  subject: "Password Reset",
  resetUrl,
  filename: "password-reset",
})
Next we have to generate the actual HTML to send. We are going to create a method called generateHTML() which takes in two parameters, a filename and options which defaults to an empty object.
We are going to make that a const instead of an export because it is only needed within this file.
const generateHTML = (filename, options = {}) => {
  const html = pug.renderFile()
}
You pass the renderFile() method the name of the file you are looking for.
There is a problem. Whenever you pass a function a reference to something on your disk, you don’t actually know where you are in the file system because the renderFile method lives in a different folder. What we do is use to reference a variable that is available in every file __dirname.
const generateHTML = (filename, options = {}) => {
  const html = pug.renderFile(
    `${__dirname}/../views/email/{filename}.pug`,
    options
  );
We pass in the pug email template as the first param and the options as the second.
Next, we modify the send function to get the html and pass it to the send function ->
exports.send = async options => {
  const html = generateHTML(options.filename, options)
  const mailOptions = {
    from: "ANja Gusev <noreply@anjagusev.com>",
    to: options.user.email,
    subject: options.subject,
    html,
    text: "This will also be filled in later",
  }
  const sendMail = promisify(transport.sendMail, transport)
  return sendMail(mailOptions)
}
Now when you trigger a password reset email you get the following ->
However the plain text version is not correct and the css is not inlined.
For plain-text, in the send method, you add the following code:
const text = htmlToText.fromString(html); and replace it in the mailOptions object.
Juice is a library which will look at your style tags and inline them all appropriately by matching selectors etc.
Modify the generateHTML() method like so ->
const generateHTML = (filename, options = {}) => {
  console.log(__dirname)
  const html = pug.renderFile(
    `${__dirname}/../views/email/${filename}.pug`,
    options
  )
  const inline = juice(html)
  return inline
}
29 - Locking down App with User Permissions
Right now we have stores and users collections in mongo but no relationship between them. We need to add an author store to the stores.
Add author field to the Store.js model of type ObjectId and referencing the “User” model.
  author: {
    type: mongoose.Schema.ObjectId,
    ref: “User”,
    required: "You must supply an author"
  }
Now we have to make sure when you create a store there is a user associated.
In the storeController modify the createStore method like so:
exports.createStore = async (req, res) => {
  req.body.author = req.user._id;
  const store = await new Store(req.body).save();
If you want to populate the author field with the actual user object you can call .populate(‘author’) on a database find request like so in storeController.js ->
 const store = await Store.findOne({ slug: req.params.slug }).populate(
    “author”
  );
Now we need to prevent people from editing stores which they do not own
In the editstore method, before they actually edit the store, we have to make sure they are the owner.
const confirmOwner = (store, user) => {
  if (!store.author.equals(user._id)) {
    throw Error("you must own a store in order to edit it")
  }
}
The .equals method comes along because the store.author is an objectid and in order to compare an objectid with an actual string, we use the .equals method. If it’s not a match, throw an error.
We aren’t using middleware here because we need to look up the store before we perform the check.
So we are making a function called confirm owner and call it from edit store, which should throw an error if they are not which is hopefully caught by our error handling middleware.
We currently have incomplete data because some of our stores do not have authors associated. We need to cleanup mongo at this step.
ANJA DONT FORGET
Now we need to edit the stores interface to only show the edit pencil if it is a store the user owns.
To do that, we need to edit _storeCard.pug to add a conditional
   if store.author.equals(user._id)
          .store__action.store__action—edit
            a(href=`/stores/${store._id}/edit`)
              != h.icon(‘pencil’)
However, now if you open up the stores view in incognito you get this error
 Because no one is logged in. We need to add check for user in the if statement
if user && store.author.equals(user._id)
You could create different security roles by adding a “level” property to the user object for example.
30 - Loading Sample Data
If you open package.json file, there are a few scripts. The sample and blowitallaway will run a script that loads a bunch of sample data.
load-sample-data.js
npm run sample
Note: Make sure database exists first.
31 - JSON endpoints and creating mongodb indexes
When you search for coffee, it should show a list of stores with coffee in the name and description.
We are going to add indexes.
In the store schema Store.js we will define the indexes
//define our indexes
storeSchema.index({
  name: "text",
  description: "text",
})
We can tell mongodb what to index the field as. We are going to tell it to index the field as text so we can search strings and also search by case sensitive.
If you refresh compass you will see the indexes under stores. The indexes we created is a compound index.
Now we are going to make an api endpoint.
router.get(“/api/search”, catchErrors(storeController.searchStores));This endpoint is going to take one param ?q=searchterm which is actually a query object not a param.
You can access it like so within the storeController.js
exports.searchStores = async (req, res) => {
  res.json(req.query)
}
Now we need to search the db for the stores that include name or description
Since we indexed the two fields as compound indexes and as text, we can use the mongodb text operator which will perform a text search on any fields that are indexes with text index.
exports.searchStores = async (req, res) => {
  const stores = await Store.find({ $text: { $search: req.query.q }, score: {$meta:'textScore });
  res.json(stores);
};
However it doesn’t put them in any specific order, just orders them by the order they were added to the database. We need a sort based on a “score” where the store where the store where the search term shows up the most has the highest score.
We can use $meta operator, it allows us to project a field using some of the hidden data that mongo has about our search results. We can add it to the actual end result.
We take our find, and pass a second object to tell it to project field called score which grabs the textStore from the meta object.
Now we want to sort the query.
exports.searchStores = async (req, res) => {
  const stores = await Store.find(
    { $text: { $search: req.query.q } },
    { score: { $meta: “textScore” } }
  ).sort({ score: { $meta: “textScore” } });
  res.json(stores);
};
Now we only want to return 5 results. Add .limit(5);`
32 - Creating an Ajax Search Interface
Create a file in this directory named typeAhead.js /public/javascripts/modules/
Next open file delicious-app.js and import typeAhead. Modify it like so ->
import “../sass/style.scss”;

import { $, $$ } from “./modules/bling”;

import autocomplete from “./modules/autocomplete”;
import typeAhead from “./modules/typeAhead”;

autocomplete($(“#address"), $("#lat"), $("#lng"));

typeAhead($(“.search”));
In the typeAhead function, add the following so if search doesn’t exist this method doesn’t return anything
if (!search) return;
Now we want to grab the search inputs from the page to grab the search query and display the results.
const searchInput = search.querySelector('input[name="search"]')
const searchResults = search.querySelector(".search__results")
We will next use blingjs syntax for add a listener to the input.
When the input function runs ,we run a callback which will log the value.
  searchInput.on(“input”, function() {
  //if there is no value,quit it
	if(!this.value){
	searchResults.style.display = "none";
return // quit it
}
  });
Next we want to show the search results searchResults.style.display = ‘block’;
And then we use axios to hit our endpoints and we get the results.
searchResults.style.display = "block"
axios.get(`/api/search?q=${this.value}`).then(res => {
  console.log(res.data)
})
This is the effect we want to have when someone searches -> the user can tab up and down and then when they select one, it will take them to that store.

Instead of writing this directly in the function, we will create another method called searchResultsHTML which takes in an array of stores and returns some HTML.
function searchResultsHTML(stores) {
  return stores
    .map(store => {
      return `
    <a href="/stores/${store.slug}" class="search_result">
    <strong>${store.name}</strong>
    </a>
    `
    })
    .join("")
}
call this function from within the typeAhead function.
function typeAhead(search) {
  if (!search) return

  const searchInput = search.querySelector('input[name="search"]')
  const searchResults = search.querySelector(".search__results")
  searchInput.on("input", function() {
    if (!this.value) {
      searchResults.style.display = "none"
      return //stop
    }

    searchResults.style.display = "block"
    axios.get(`/api/search?q=${this.value}`).then(res => {
      if (res.data.length) {
        searchResults.innerHTML = searchResultsHTML(res.data)
      }
    })
  })
}
Now when you type coffee, 3 stores show up. One issue is when you start backspacing, the stores are still showing.
To solve that, before the axis request and after setting the style to display block, add
searchResults.innerHTML=‘’; which will remove the html for that component if there are no matches.
At this stage, the search dropdown works and you can click one of the results and go to the store, however you cannot navigate the search using up and down arrows on your keyboard. We need to handle the keyboard inputs.
Add the following code to figure out which inputs we need to listen for:
//handle keyboardINputs
  searchInput.on(“keyup”, e => {
    console.log(e.keyCode);
  });
UP = 38 Down = 40 ENTER = 13
Screen Recording 2019-03-29 at 21.58.gif One issue we have here is that when you use the up and down arrows, when you get to the bottom, if you press down it should go to the top. Similarly if you are on the first result and go up, it should go to the bottom.
The active search result will have a class marking it as currently active.
What we need to do is find the current active result, and all the other results
    const current = search.querySelector(`.${activeClass}`);
    const items = search.querySelectorAll(“.search__result”);
Next we need a let variable called next because we will be updating it.
We are going to figure out what are we currently on, and if someone presses down or up, which is going to be the next one.
If they press down, and there is one selected, we want to set next to be the one after it or if on the last one, fall back to the first item.
if (event.keyCode === 40 && current) {
  next = current.nextElementSibling || items[0]
}
Then, if the key code is equal to 40, and there is no active one, set the next item to the first item.
else if (e.keyCode === 40) {
      next = items[0];
    }
If the key code is 38 (up) and there is a current one, set the next item to be the previous sibling element, or if there is no previous sibling element, the last item is next
else if (e.keyCode === 38 && current) {
      next = current.previousElementSibling || items[items.length - 1];
    }
If the up key is pressed and there is no currently selected item, set the next item to be the last item.
else if (e.keyCode === 38) {
      next = items[items.length - 1];
    }
If someone submits key code 13 and there is an href value, set the window location to that value, and return to prevent this method from continuing to run
      window.location = current.href;
      return;
    }
Now we want to add the active class to the next item, and remove the current active class from the current item.
if (current) {
  current.classList.remove(activeClass)
}
next.classList.add(activeClass)
On thing from earlier is we are requiring axios rather than importing it like we are in the rest of our files. The reason it worked is because we are using web pack and it gets compiled to common javascript after.
Modify from
const axios = require(“axios”);
To
import axios from ‘axios’
To keep it consistent where we are using es6 modules on the front end and common runtime modules on the server side because es6 modules aren’t available yet.
When someone is searching for something and there are no results, we want to show them that there are no results.
Remove
searchResults.innerHTML = “”;
And in the axios modify like so
searchResults.innerHTML = `<div class=“search__reslts”>No results for ${
  this.value
} found!</div>`
We are open to a cross site scripting attack here however.
Lets say you put an image tag in the name and put an onLoad event that alerts the user “you’ve been hacked”. Pug will take care of this on the front end by not actually loading the image. However in the search results we are adding the html.
Before you add HTML you should sanitize it.
We should also do it on the search input because someone could inject something by searching for it.
if (res.data.length) {
  searchResults.innerHTML = dompurify.sanitize(searchResultsHTML(res.data))
}
searchResults.innerHTML = dompurify.sanitize(
  `<div class=“search__results”>No results for ${this.value} found!</div>`
)
That will now cause the onLoad alert to not trigger when you search for that store, although the image will still show up.
If you wanted to prevent an image from being added ,you could go to the store model and add a pre-save event where you strip out all unnecessary tags.
33 - Creating a Geospatial Ajax Endpoint
We are going to be making a store locator with google maps built in We are going to make an api endpoint that we can ping given a lat and lng and it will return the top 10 closest stores within x distance.
It will centre the map, take everything you got from the api and plop the markers.
We need to index our data, create a route etc like we did for the search functionality.
We are going to tell it that the location is geospatial, it will store the metadata about that location as geospatial data and then it will be able to quickly and easily search for things near the lat and lng we pass it.
Add this code ->
//Store.js
storeSchema.index({ location: “2dsphere” });
If you refresh, you will see these indexes have been added on the store object.
Next we create a route and then a method to handle that route.
router.get(‘/api/stores/near’, catchErrors(storeController.mapStores))In storeController add a mapStores method for the endpoint which accepts query parameters like so:
exports.mapStores = async (req, res) => {
  const coordinates = [req.query.lng, req.query.lat]
  res.json(coordinates)
}
However this will give us the lat & lng in string format. To unstring it we do:
const coordinates = [req.query.lng, req.query.lat].map(parseFloat);` exports.mapStores = async (req, res) => {
const coordinates = [req.query.lng, req.query.lat].map(parseFloat);
const q = {
location: {
$near: {
$geometry: {
type: “Point”,
coordinates: coordinates
},
$maxDistance: 10000//10 km
}
}
};
const stores = await Store.find(q);
res.json(stores);
};One thing we want to do is keep our Ajax requests as slim as possible.
We need the name, photo, description and address.
You can chain .select() method on the mongo query.
To only select some you do ->
const stores = await Store.find(q).select(‘name photo’);
To exclude fields you do ->
const stores = await Store.find(q).select(‘-author -tags’);
We will select the following:
const stores = await Store.find(q).select(“slug name description location”).limit(10)
This will keep our Ajax request quick and light.
34 - Plotting Stores on Custom Google Map
Make a route for /map url, add a mapPage method to the store controller and create a map.pug view.
After that, we have to write the client side javascript. Add new file in /public/javascripts/modules/map.js
In that file, Import axios, create two functions called loadPlaces and makeMap and export it.
In delicious-app.js import it and use it. makeMap($(#map)
Now on the map page, the console should log the div. However, on the store page where there is no map it will be null so we have to handle that
if (!mapDiv) return;
On the layout page, the javascript library for maps is already loaded so we can just make our map.
First we will worry about getting the map on the page, and then about putting the markers.
To get the map on the page, we need to pass some options.
const mapOptions = {
  center: { lat: 43.2, lng: -79.8 },
  zoom: 10,
}
To create the map, you pass it the div and then the options like so ->
const map = new google.maps.Map(mapDiv, mapOptions);
Next line call other method
loadPlaces(map);
We also enable autocompleting:
const autocomplete = new google.maps.places.Autocomplete(input);
When the page loads, we run makeMap which will make the map, once it’s done being created loadPlaces will take that map and take a specific lat and lng to hit the endpoint with.
Inside of loadPlaces, we need to return if there are no places found.
Next we need to add markers.
const markers = places.map(place => {
  const [placeLng, placeLat] = place.location.coordinates
})
-> we are destructuring. The order of lng and lat matters here.
next we need to create a position object and pass it to create our markers like so:
const position = { lat: placeLat, lng: placeLng }
const marker = new google.maps.Marker({ map, position })
We also want to pass along the location information and attach it to the marker. Add the following code ->
marker.place = place
return marker
One problem we have is zoom level. We can use “bounds” which will detect where the markers are but will zoom in as far as it can with all the markers still in place.
const bounds = new google.maps.LatLngBounds();
And before we pass the marker to the google maps method, we want to do:
bounds.extend(position);
Once we are doing looping over all the markers, we want to zoom the map to fit them perfectly
map.setCenter(bounds.getCenter())
map.fitBounds(bounds)
However when you click on the markers right now, nothing happens. Now we need to make an info window.
const infoWindow = new google.maps.InfoWindow();
Next, once we have all the markers, we want to loop over then and add an event listener for onclick.
    //when someone clicks on a marker, show the details of that place
    markers.forEach(marker =>
      marker.addListener(“click”, function() {
        console.log(this);
      })
    );
You want to use a regular function because the “this” variable contains info about the marker and has the place info in it.
We need to create some html to pass to the info window using the places info.
//when someone clicks on a marker, show the details of that place
markers.forEach(marker =>
  marker.addListener("click", function() {
    infoWindow.setContent(this.place.name)
    infoWindow.open(map, this) //we pass this so it opens ontop to the marker.
  })
)
When you click on a marker, the name appears. There is only one info window , so when you click another marker that marker info window disappears and the newly clicked one gets a info window.
Now we want to add information into the info window like so:
    //when someone clicks on a marker, show the details of that place
    markers.forEach(marker =>
      marker.addListener(“click”, function() {
        const html = `
        <div class=“popup”>
        <a href=“/store/${this.place.slug}”><img src=“/uploads/${this.place
          .photo || “store.png”}” alt=“${this.place.name}”/></a>
        <p>${this.place.name} - ${this.place.location.address}</p>
        </div>`;
        infoWindow.setContent(html);
        infoWindow.open(map, this); //we pass this so it opens ontop to the marker.
      })
    );
Next is when you type in an address on the map, the map should take the lat and lng of the place you typed in and find markers within that area.
To do this, we go back to our makeMap function and listen to when the autocomplete changes itself. We also want to load the places.
const autocomplete = new google.maps.places.Autocomplete(input)
autocomplete.addListener("place_changed", () => {
  const place = autocomplete.getPlace()
  loadPlaces(map, place.geometry.location.lat(), place.geometry.location.lng())
})
35 - Pushing User Data to our API
We will add the ability to like stores, and then the ability to filter stores to only see the ones you’ve liked.
First we need to modify the user schema because every time you like a store, that stores id will get added to your user account.
Open up Users.js and add a new property called hearts which will take an array of objects with type of mongoose schema objectId, which references the store.
hearts: [{ type: mongoose.Schema.ObjectId, ref: “Store” }]
Next modify _storeCard.pug so that if the user is logged in, they can heart it.
.store__action.store__action—heart
            form.heart(method=“POST” action=`/api/stores/${store._id}/heart`)
              button(type=“submit” name=“heart”)
                != h.icon(‘heart’)
Now we need to make a route to handle that.
Next we make our controller method. We need to grab all the stores the user has currently liked, so we know to unlike if they press the same store again or if it’s not on the list, when the user presses like we should add it to the list.
const hearts = req.user.hearts.map(obj => obj.toString()); <- we can use toString here because mongo have overwritten the toString method .
const operator = hearts.includes(req.params.id) ? ‘$pull’: ‘$addToSet’; -> if there is already the heart id, pull it from the list. If there isn’t add it to the set. We use addtoset rather than push so we don’t duplicate the value.
const user = await User.findByIdAndUpdate(
  req.user._id,
  { [operator]: { hearts: req.params.id } },
  { new: true }
)
The new operator specifies return the updated user, not the user as they were before the update.
In the layout, you can view how many hearts you currently have due to this code:
 if user
              li.nav__item: a.nav__link(href=“/hearts”, class=(currentPath.startsWith(‘/hearts’) ? ‘nav__link—active’ : ‘’))
                != h.icon(‘heart’)
                span.heart-count #{user.hearts && user.hearts.length}

We will update the heart so it’s red if we have hearted it.
First we need a list of all of the heart strings, and then look if that store is include in it.
.store__action.store__action—heart
            form.heart(method=“POST” action=`/api/stores/${store._id}/heart`)
              -const heartStrings = user.hearts.map(obj=>obj.toString())
              -const heartClass = heartStrings.includes(store._id.toString()) ? ‘heart__button—hearted’ :  ‘’
              button(type=“submit” name=“heart” class=heartClass)
                != h.icon(‘heart’)
-> This will show a red heart is on the stores that are hearted
Now we will use api endpoint to do that automatically without leaving the page, turn the colour, add to the user and update the heart count.
Create new js file in public/javascript/modules called heart.js
In that we export axios and make a method that will take an event (we are going to hook it up to the submit form we have)
In delicious-app.js import ajaxHeart method we created in the hearts file and grab all the heart forms, and bind the on submit to the ajaxHeart method like so ->
const heartForms = $$(“form.heart”);
heartForms.on(“submit”, ajaxHeart);
The $$ is query selector all. And we can call “on submit” directly to the node list using blingjs.
Next in heart.js we are going to post via javascript rather than the form.
We are going to post to this.action.. this is the form and the action is the url we want to hit:
function ajaxHeart(e) {
  e.preventDefault()
  console.log("HEART ITTTT")
  axios
    .post(this.action)
    .then(res => {})
    .catch(console.error)
}
Inside the .then add the following ->
.then(res => {
      const isHearted = this.heart.classList.toggle(“heart__button—hearted”);
      console.log(isHearted);
That will toggle the heart red or white depending on whether it has been liked.
Now we need the number to be updated in the header. In the header there is a class .heart-count which is responsible for the number of hearts.
Inside the then, we grab it using bling and write the following code ->
$(“.heart-count”).textContent = res.data.hearts.length;
Res.data is the user object and it contains the number of hearts.
Now we are adding a css animation to the heart. On the button we have an after element with content heart. When there is a class of float, we add an animation of fly that will transition it from where it is to the top.
After 2.4 seconds we want to remove the heart button float class.
.then(res => {
      const isHearted = this.heart.classList.toggle(“heart__button—hearted”);
      $(“.heart-count”).textContent = res.data.hearts.length;
      if (isHearted) {
        this.heart.classList.add(“heart__button—float”);
        setTimeout(
          () => this.heart.classList.remove(“heart__button—float”),
          2500
        );
      }
We use the timeout with an arrow function so we can keep the this reference from the parent function.
36 - Displaying our Hearted Stores
We want to show the stores that we have hearted when a user navigates to to /hearts
We can do that two ways.. we could query the current user and call .populate() on their hearts, or we can query a bunch of stores and find the stores who ids are in the current heart array.
One issue is if a user is not logged in and they navigate to this tore, it will give them an error so we need to add middleware that will double check if the person is logged in and tell them they must login to view if they haven’t.
router.get(
  "/hearts",
  authController.isLoggedIn,
  catchErrors(storeController.getHearts)
)
37 - Adding Reviews Data Model
Add a review data model called Review.js and add it to start.js.
const mongoose = require(“mongoose”);
mongoose.Promise = global.Promise;

const reviewSchema = new mongoose.Schema({
  created: {
    type: Date,
    default: Date.now
  },
  author: {
    type: mongoose.Schema.ObjectId,
    ref: “User”,
    required: “You must supply an author!”
  },
  store: {
    type: mongoose.Schema.ObjectId,
    ref: “Store”,
    required: “You must supply a store!”
  },
  text: {
    type: String,
    required: “Your review must have text!”
  },
  rating: {
    type:Number,
    min: 1,
    max:5
  }
});

module.exports = mongoose.model(“Review”, reviewSchema);
Next create a reviewForm as a mixin and import it to the bottom of store.pug file. Display the form if the user is logged in.
If you want to be able to click a label and select the input that is associated with it, you need to make sure your for and id are identical like so:
input(type=“radio” required id=`stars${num}` name=“rating” value=num)
label(for=`stars${num}`)
Entire review form so far:
mixin reviewForm(store)
  form.reviewer(action=`/reviews/${store._id}` method=“POST”)
    textarea(name=“text” placeholder=“Did you try this place? Have something to say? Leave a review…”)
    .reviewer__meta
      .reviewer__stars
        each num in [5,4,3,2,1]
          input(type=“radio” required id=`star${num}` name=“rating” value=num)
          label(for=`star${num}`) #{num} Stars
      input.button(type=“submit” value=“Submit Review →”)
Create reviewController.js and addReview method inside of it.
const mongoose = require(“mongoose”);
const Review = mongoose.model(“Review”);

exports.addReview = async (req, res) => {
   res.json(req.body);
};

To add author and store to the request, and save the review we can use this code ->
exports.addReview = async (req, res) => {
  req.body.author = req.user._id;
  req.body.store = req.params.id;
  const newReview = new Review(req.body);
  await newReview.save();
  req.flash(“success”, “Review saved!”);
  res.redirect(“back”);
};
38 - Advanced Relationship Population - Displaying our Reviews
In this tutorial we are going to get reviews to show up on a stores page. We need a second query where we search for any reviews with that store’s id.
We can also do a virtual populate which is new in mongoose.
In the store schema we add.. We are going to tell it to go off to another model and do a query.
//find reviews where the stores _id property ===reviews store property
storeSchema.virtual(“reviews”, {
  ref: “Review”, //what model to link?
  localField: “_id”,//which field on the store?
  foreignField: “store”//which field on the review
});
In storeController.getStorebySlug add
.populate(‘author reviews’);
//storeController.js
exports.getStoreBySlug = async (req, res, next) => {
  //1. Query database for a store based on slug
  const store = await Store.findOne({ slug: req.params.slug }).populate(
    "author reviews"
  )
  if (!store) return next()
  // res.json(store);
  res.render("store", { title: store.name, store })
}
Virtual fields do not actually go to an object or JSON unless you specifically ask it to. So if in store.pug you did ->
block content
  pre=h.dump(store)
You would see the following:
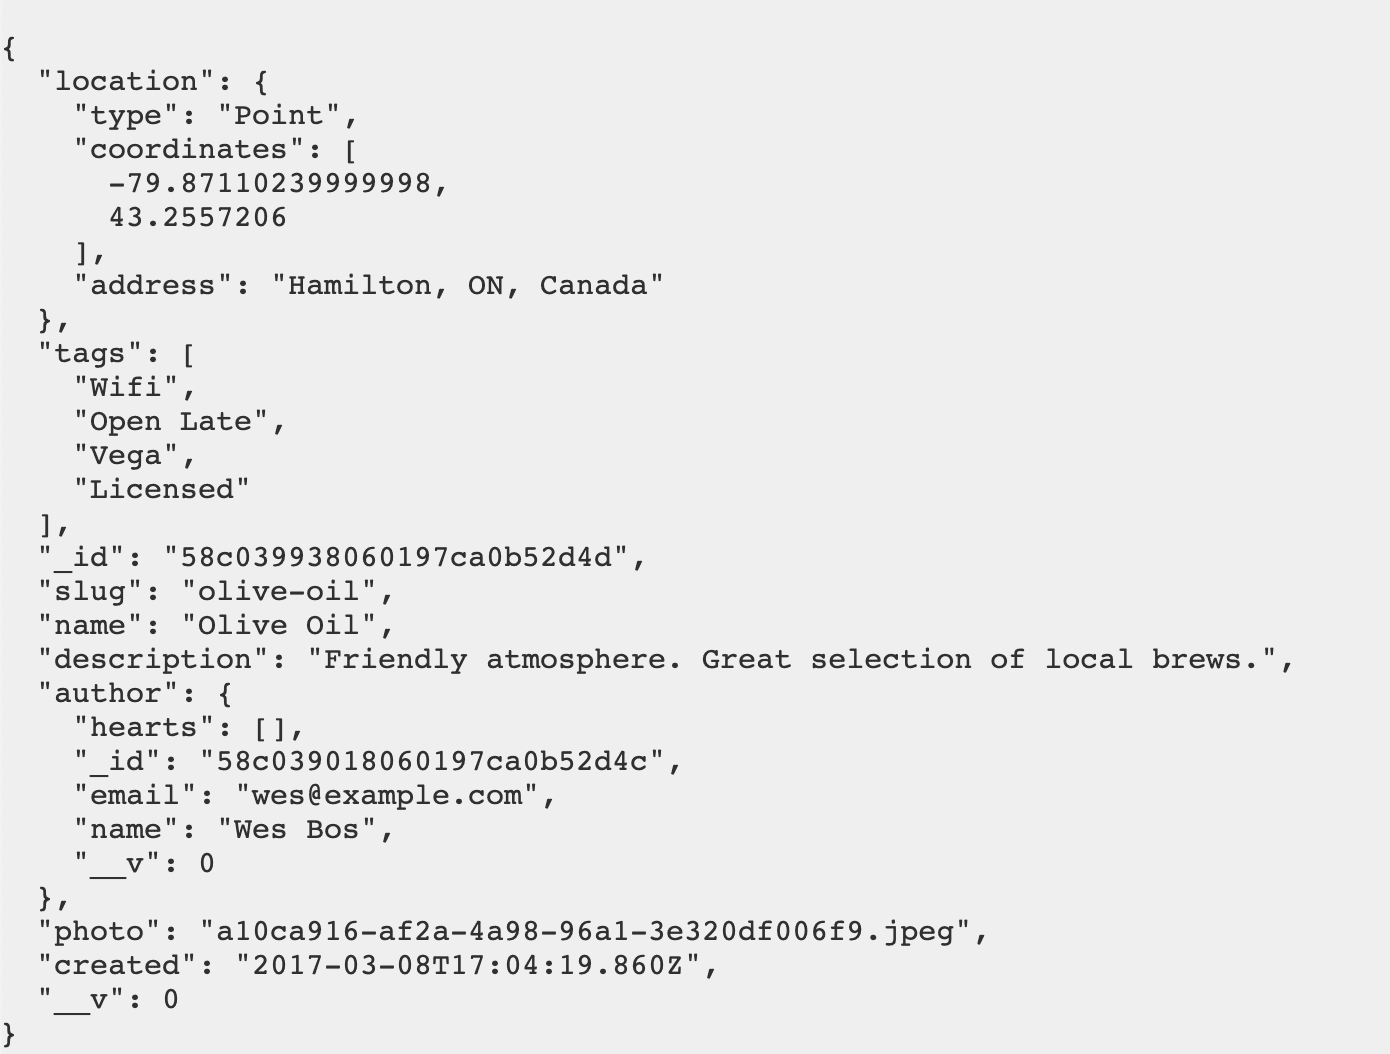
But if you explicitly asked for pre=h.dump(store.reviews) then it would show the reviews.
If you want to make the virtual fields show up in the .toJSON or the .toObject you can modify the schema like so:
//Store.js
    author: {
      type: mongoose.Schema.ObjectId,
      ref: “User”,
      required: “You must supply an author”
    }
  },
  {
    toJSON: { virtuals: true },
    toObject: { virtuals: true }
  }
);
In store.pug add the following:
  if store.reviews
        .reviews
          each review in store.reviews
            .review
              p= review.text
Should look like ->
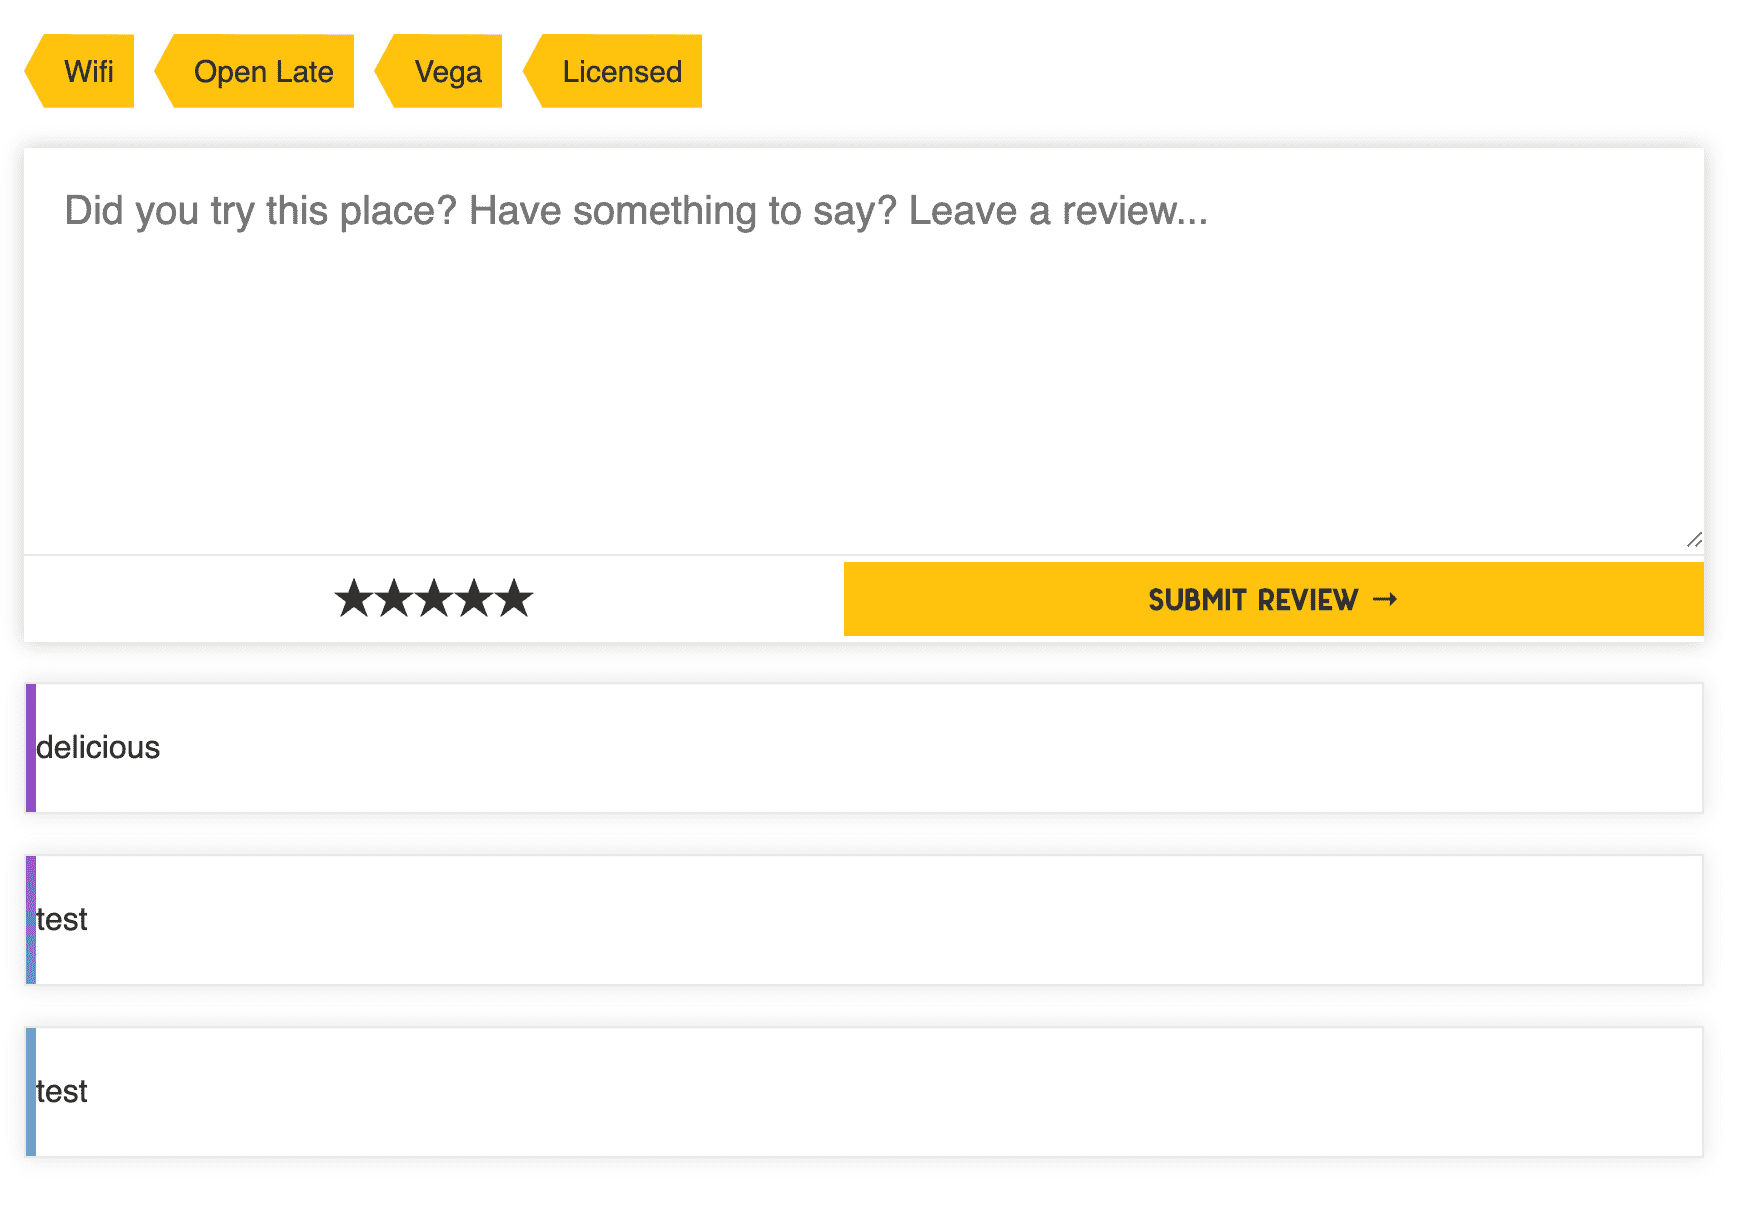
Add a mixin titled _review.pug
mixin review(review)
  .review__header
    .review__author
    .review_-starts
    time.review__time
  .review__body
    p= review.text
One problem we have is in the review json only contains the id of the author (it’s not populated). What we need to do is to ensure when the review is queried, it’s going to auto-populate the author field.
Go back to Review.js model and we will create a function called autopopulate()
function autopopulate(next) {
  this.populate(“author”);
  next();
}
Now we can add hooks so whenever review is queried, we are going to automatically populate the author field.
Add this code ->
reviewSchema.pre(‘find’, autopopulate);
reviewSchema.pre(‘findOne’, autopopulate)
Which will add hooks so that anytime someone finds or finds one, it will populate the author field.
In _review.pug we add ->
//_review.pug
mixin review(review)
  .review__header
    .review__author
      img.avatar(src=review.author.gravatar)
      p= review.author.name
    .review__stars(title=`Rated ${review.rating} out of 5 stars`)
      = `★`.repeat(review.rating)
      =`☆`.repeat(5-review.rating)
    time.review__time(datetime=review.created)= h.moment(review.created).fromNow()
  .review__body
    p= review.text
Which in turn gives us ->
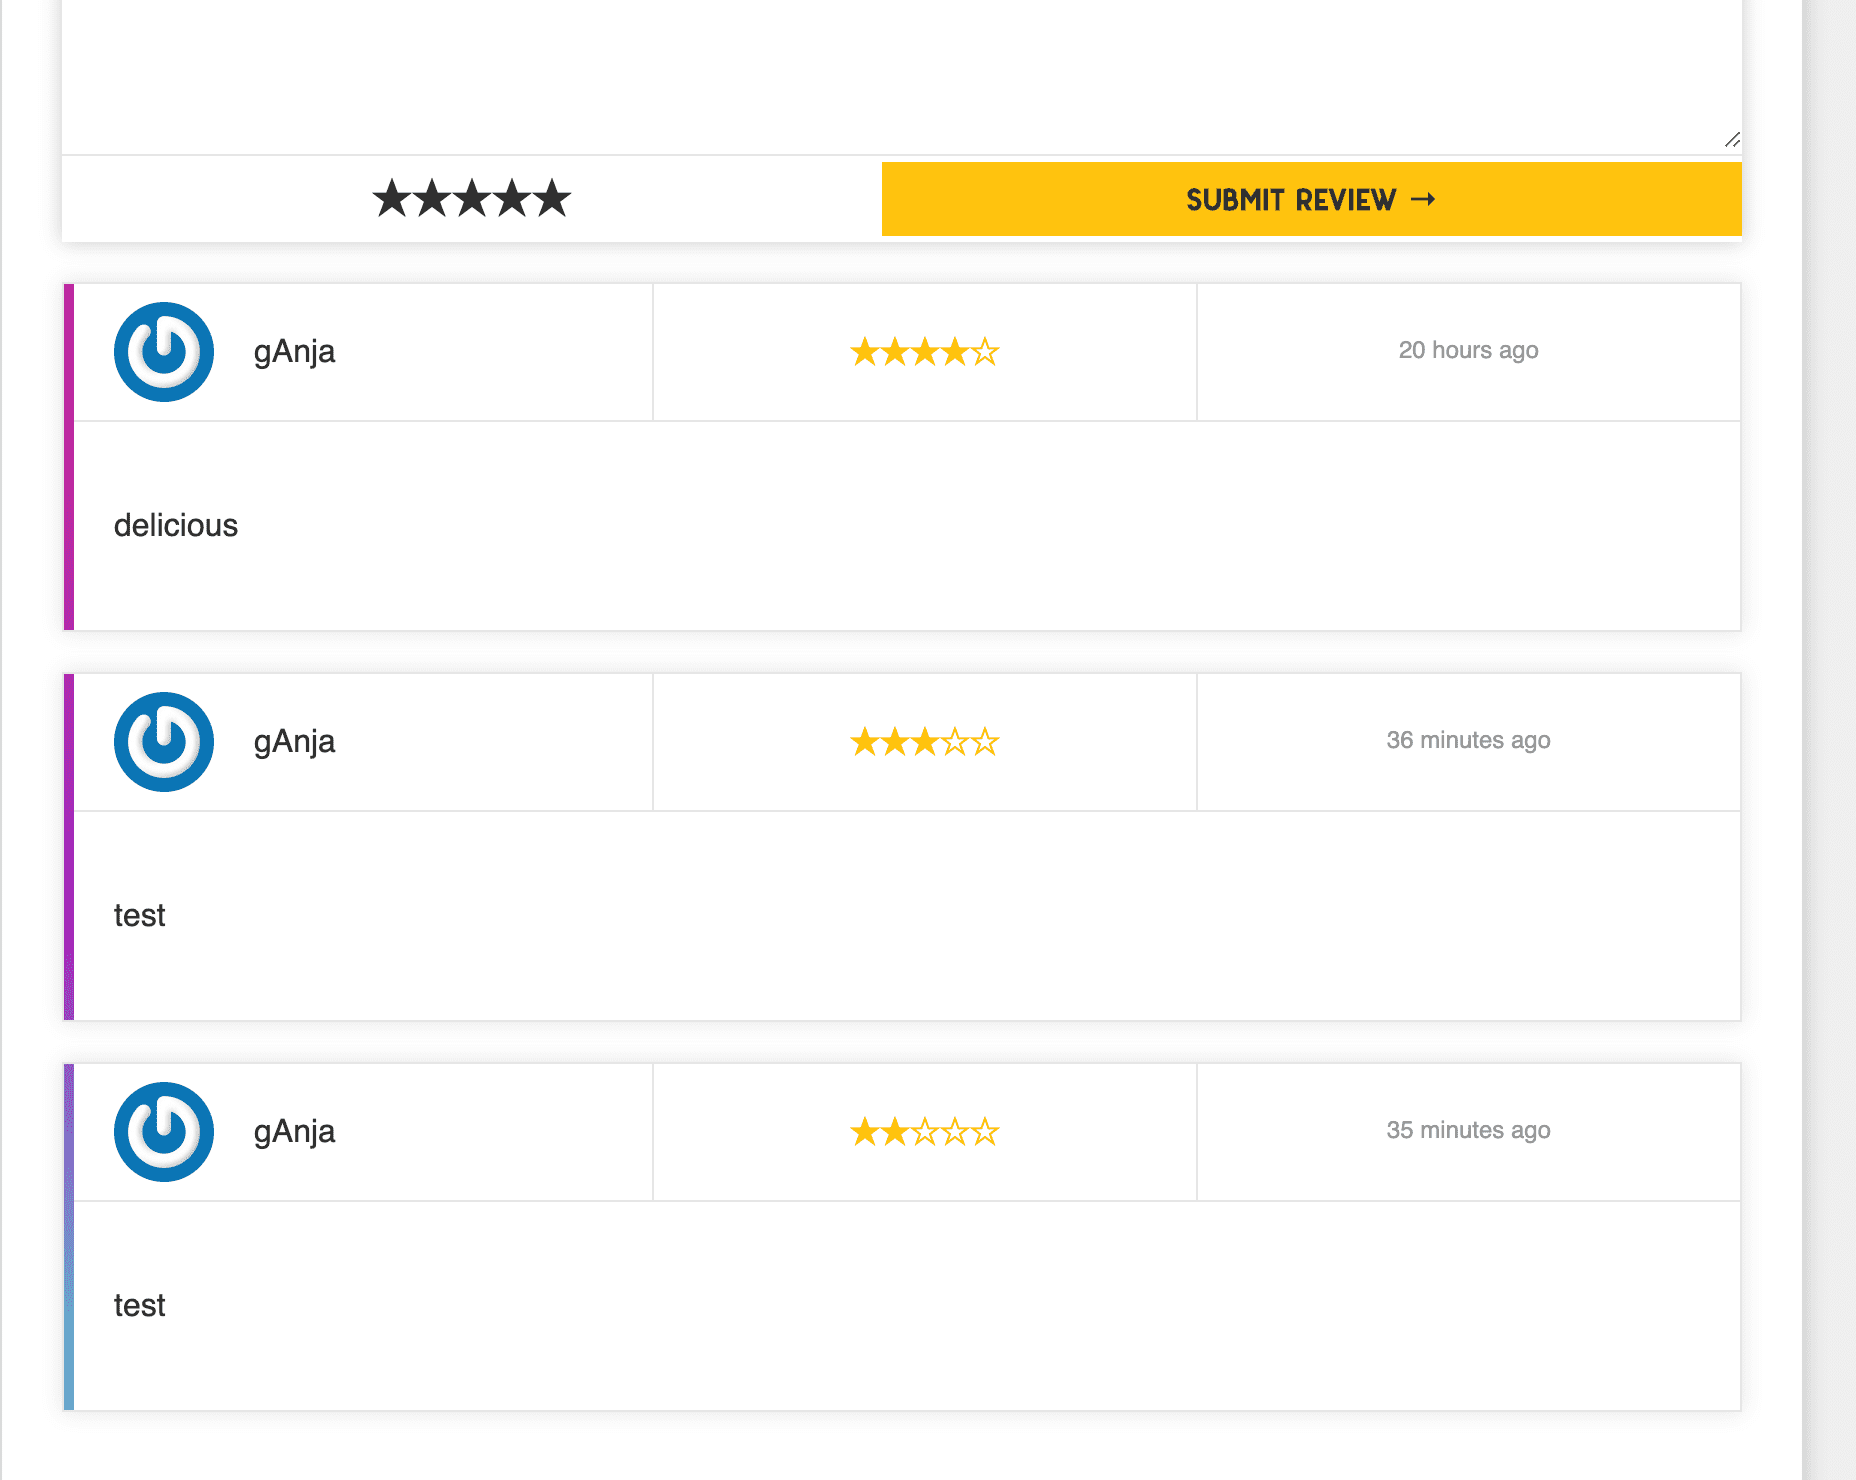
We import the library moment from our helpers here to display relative time and also give a datetime value to the time tag for screenreader.
We also added a title for ur screenreader in our review__stars div.
time.review__time(datetime=review.created)= h.moment(review.created).fromNow()
39 - Advanced Aggregation
We are going to get a list of top 10 stores based on their ratings.
The issue we have reviews and stores in separate collections, so we need to aggregate. We want to grab a list of our stores, populate their rating and then find out what the average rating of that store is. We also don’t want to show stores that have one rating because that would bring them right to the top.
Create a route for the Top page in index.js
router.get(“/top”, catchErrors(storeController.getTopStores));Add a method in storeController.js
//storeController.js
exports.getTopStores = async (req, res) => {
  const store = await Store.getTopStores()
  res.render("topStores", { stores, title: "⭐ Top Stores!" })
}
Instead of putting Store.getTopStores(); in the controller, we are going to put it in the Store.js schema so it is closer to the model because it’s a custom query.
storeSchema.statics.getTopStores = function() {
  return this.aggregate([])
}
We use a proper function so we can use “this” which references the instance of the store model.
In the aggregate, we cannot use the virtual field because that is a mongoose thing but the aggregate goes right to mongodb.
{$lookup: { from: ‘reviews’, localField: ‘_id’, foreignFIeld: ‘store’, as: ‘reviews’}}
The from: ‘reviews’ portion, mongo actually takes the model name and lowercases and adds an s. That is where we get that field name from.
The “as: reviews” portion is the name under which the reviews will show up. We could name this field whatever we want.
If that is all we have in the aggregate method and we return res.json(stores) from storeController.getTopStores() we will see the following:
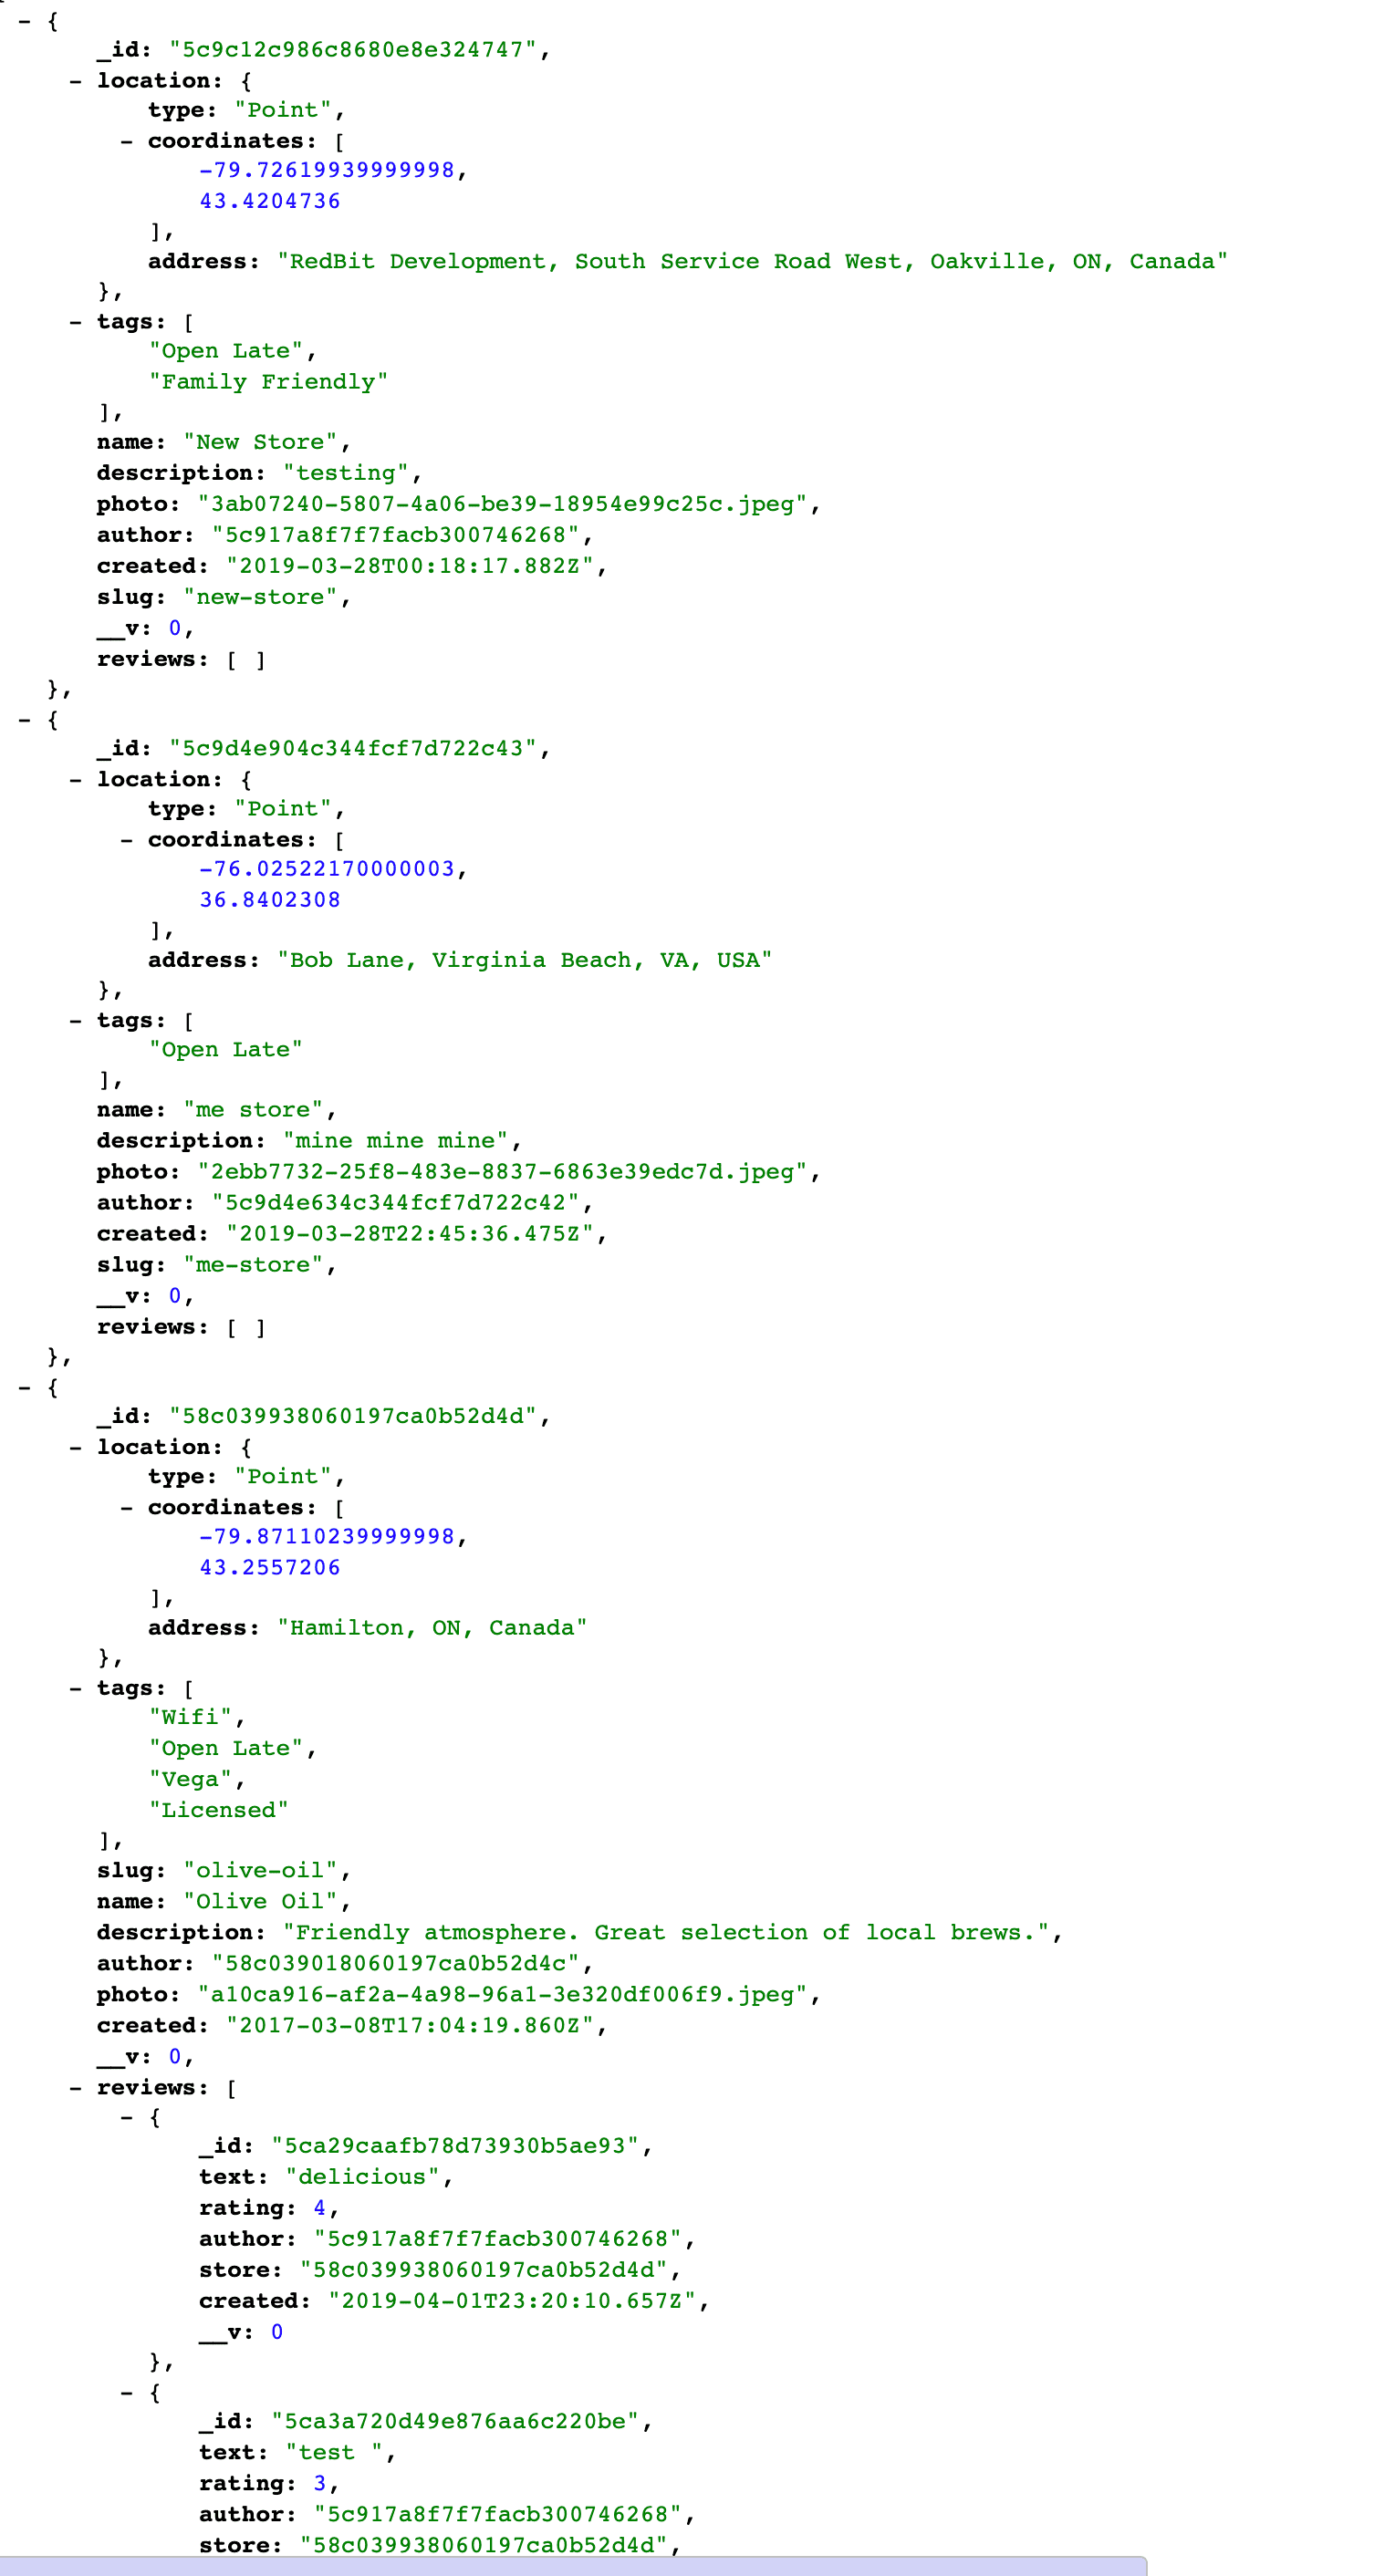
Next method in the aggregate is ->
{ $match: { “reviews.1”: { $exists: true } } } -> this looks at whether a second review item exists.
**
We take a break here to load sample data which we uncommented earlier .
We uncomment the reviews that we commented earlier (4 lines in total) and then stop the node process and run the blowitallaway script instead
$ npm run blowitallaway
And then
$ npm run sample
**
Next we want to add a field for the average rating using a project.
{ $project: {
      averageRating: { $avg: ‘$reviews.rating’}
    }}
This is saying create the new field using the average of each review’s rating.
However now all our returned data looks like this ->
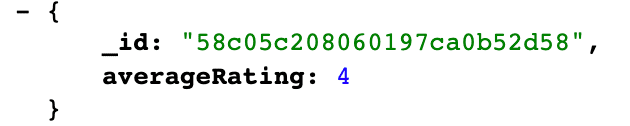
But if instead of $project you used $addFields it would work, however that is only available in mongo 3.4 and above.
Otherwise we have to do ->
{
      $project: {
        photo: “$$ROOT.photo”,
        name: “$$ROOT.name”,
        reviews: “$$ROOT.reviews”,
        averageRating: { $avg: “$reviews.rating” }
      }
    }
```e

$$ROOT is equal to the original document.

We want to sort by average rating from highest to lowest like so ->
` {$sort : { averageRating: -1}}`

Now we limit to 10 ` { $limit: 10 }`

Entire aggregation ->

```javascript
storeSchema.statics.getTopStores = function() {
  return this.aggregate([
    //Lookup Stores and populate their reviews
    {
      $lookup: {
        from: “reviews”,
        localField: “_id”,
        foreignField: “store”,
        as: “reviews”
      }
    },
    //filter for only items that have 2 or more reviews
    { $match: { “reviews.1”: { $exists: true } } },
    //add the average reviews field
    {
      $project: {
        photo: “$$ROOT.photo”,
        name: “$$ROOT.name”,
        reviews: “$$ROOT.reviews”,
        slug: “$$ROOT.slug”,
        averageRating: { $avg: “$reviews.rating” }
      }
    },
    //sort it by our new field, highest reviews first
    { $sort: { averageRating: -1 } },
    //limit to at most 10
    { $limit: 10 }
  ]);
};
Next create a new view called topStores.pug
//topStores.pug
extends layout

block content
  .inner
    h2 Top #{stores.length} Stores
    table.table
      thead
        td photo
        td ranking
        td name
        td reviews
        td Average Rating
      each store, I in stores
        tr
          td
             a(href=`/store/${store.slug}`)
              img(width=200 src=`/uploads/${store.photo  || 'store.png'}` alt=store.name)
          td #{i + 1}
          td: a(href=`/store/${store.slug}`)= store.name
          td= store.reviews.length
          td #{Math.round(store.averageRating * 10) / 10} / 5
The last thing we want to do is show the number of reviews on the store card.
If we go into the storecard and dump the store, the reviews will be null because we have not called populate on every single time that we want it. We need to look for getStores and find the find and populate the reviews.
const stores = await Store.find().populate(“reviews”);
However we do not want to have to do that every time so we can use our auto populate.
Make a function called autopopulate in Store.js
function autopopulate(next) {
  this.populate(“reviews”);
  next();
}

storeSchema.pre(“find”, autopopulate);
storeSchema.pre(“findOne”, autopopulate);
Next we add the reviews to the store card like so ->
 if store.reviews
          .store__action.store__action—count
            != h.icon(‘review’)
            span= store.reviews.length

40 - Implementing Pagination
Stores page is getting really long.
We need to go into the stores controller and modify the .getStores method to return a specific number of stores and then skip it.
We first need to create a new route like stores/page/2
router.get(“/stores”, catchErrors(storeController.getStores));
//add the route below
router.get(“/stores/page/:page”, catchErrors(storeController.getStores));
In storeController.getStores, we need to know the page number which we can get from the url unless they are on the first page in which case we show them 1, and then we need a limit which will be 4 for us.
Now we need a visual pagination component.
We will make a mixin called pagination.
If there is more than one page, show the previous button
 if page > 1
        a(href=`/stores/page/${page -1}`) Prev
If we are not on the last page, show the next button
  if page < pages
        a(href=`stores/pages/${parseFloat(page) + 1}`)
        Next
We have to do parseFloat because it things that the page is string not a number and “1” + 1 will give you 11.
//_pagination.pug
mixin pagination(page, pages, count)
  .pagination
    .pagination__prev
      if page > 1
        a(href=`/stores/page/${page - 1}`) Prev
    .pagination__text
      p Page #{page} of ${pages} - ${count} total results
    .pagination
      if page < pages
        a(href=`stores/pages/${parseFloat(page) + 1}`)
        Next
We know which page we are on, but we don’t know the total number of pages nor the total number of records.
We need to go back to our store controller. Now that we are limiting, how can we actual know the number of items in our db?
We can use count! Instead of awaiting the store, we will be doing two queries and using promise.all to wait on both of them.
//storeController.getStores
const storesPromise = Store.find()
  .skip(skip)
  .limit(limit)

const countPromise = Store.count()

const [stores, count] = await Promise.all([storesPromise, countPromise])
Now we can figure out how many pages there will be.
const pages = Math.ceil(count / limit);
We use ceiling because if we had 17 store and the limit is 4, it would give us 4 and a decimal. We need to round that up using ceiling which is the upper limit.
One thing we need to guard against is someone going to /pages/20 and that page not existing. Right before we render out, we will put an if statement.
if (!stores.length && skip) {
  req.flash(
    "info",
    `Hey! You asked for page ${page}. But that doesn't exist. So I put you on page ${pages}`
  )
  res.redirect(`/stores/page/${pages}`)
  return
}
41- Deployment Setup
We want to make sure we have the following in our .gitignore file:
node_modules/
.DS_Store
*.log
.idea
haters/
variables.env
variables.env.now
We need a production version of variables.env
We need to modify our package.json
We don’t need to watch or recompile on the server. We need to rename start to “dev”.
“scripts”: {
    “prod”: “node ./start.js”,
    “watch”: “nodemon ./start.js —ignore public/“,
    “start”: “concurrently \”npm run watch\” \”npm run assets\” —names \”💻,📦\” —prefix name”,
    “assets”: “webpack -w —display-max-modules 0”,
    “sample”: “node ./data/load-sample-data.js”,
    “blowitallaway”: “node ./data/load-sample-data.js —delete”,
    “now”: “now -e DB_USER=@db_user -e DB_PASS=@db_pass -e NODE_ENV=\”production\” -e PORT=80”
  },
Change
prod to start
Change
start to dev
42 - Deploying to Now
We are going to use Now at Now - ZEIT
We need to add values to our package.json for deployment to now.
Duplicate and rename variables.env to variables.env.now
When we deploy, it won’t actually upload this file but in the package.json we tell it where to find those values and it copies those over to the server.
Signup for an account at Now/Zeit.
Install now globally on the terminal using command npm install now -g
We have to add our email the first time and verify it. Once that is done, in the dang-thats-delicious directory we can simply type the command now and it will begin deploying it.
ISSUE: showing directory instead of loading project..
43 - Deploying to Heroku
Create new app on heroku.
Login, select Create New App.

This will give you these instructions:
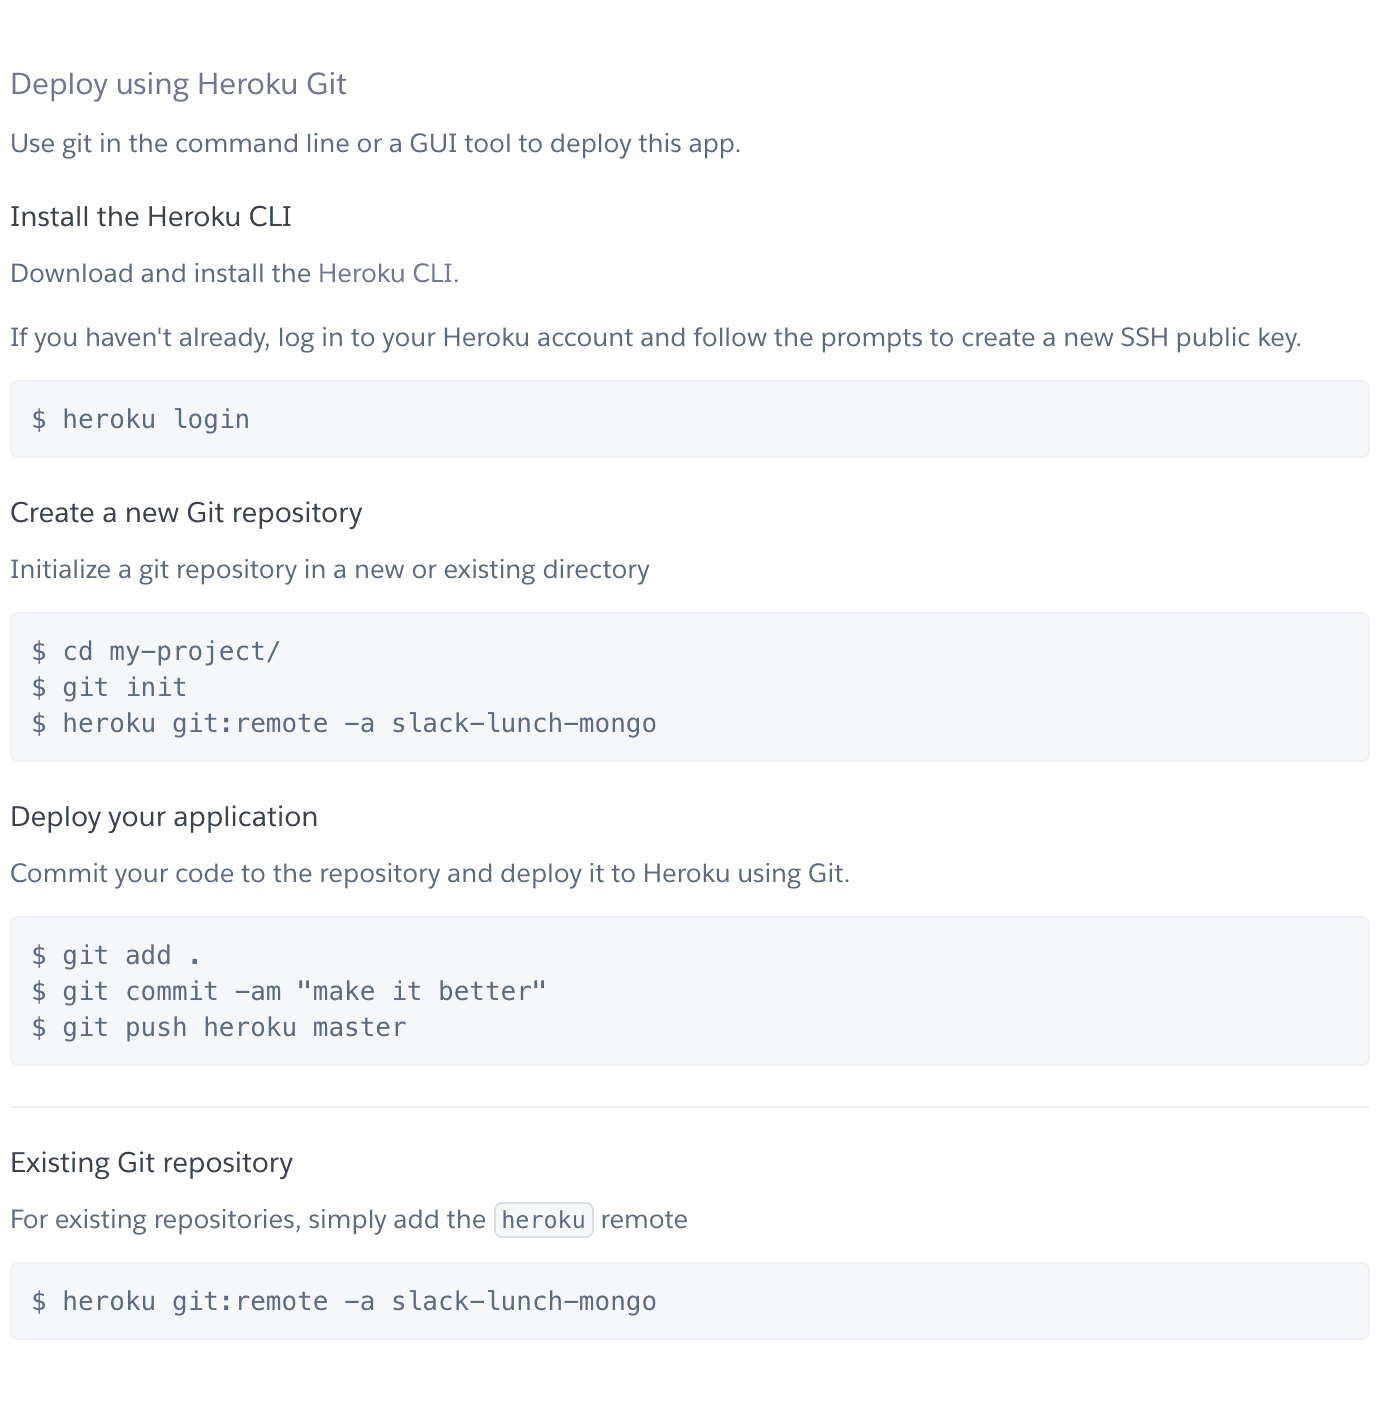
Download heroku cli Then run heroku login on the terminal.
Then in the directory on the terminal run:
heroku git:remote -a now-thats-delicious-anja
Run :
git push heroku master
To push the code to heroku,
For the environmental variables in heroku we have to set them in our dashboard.
Go to settings -> Set Config Values
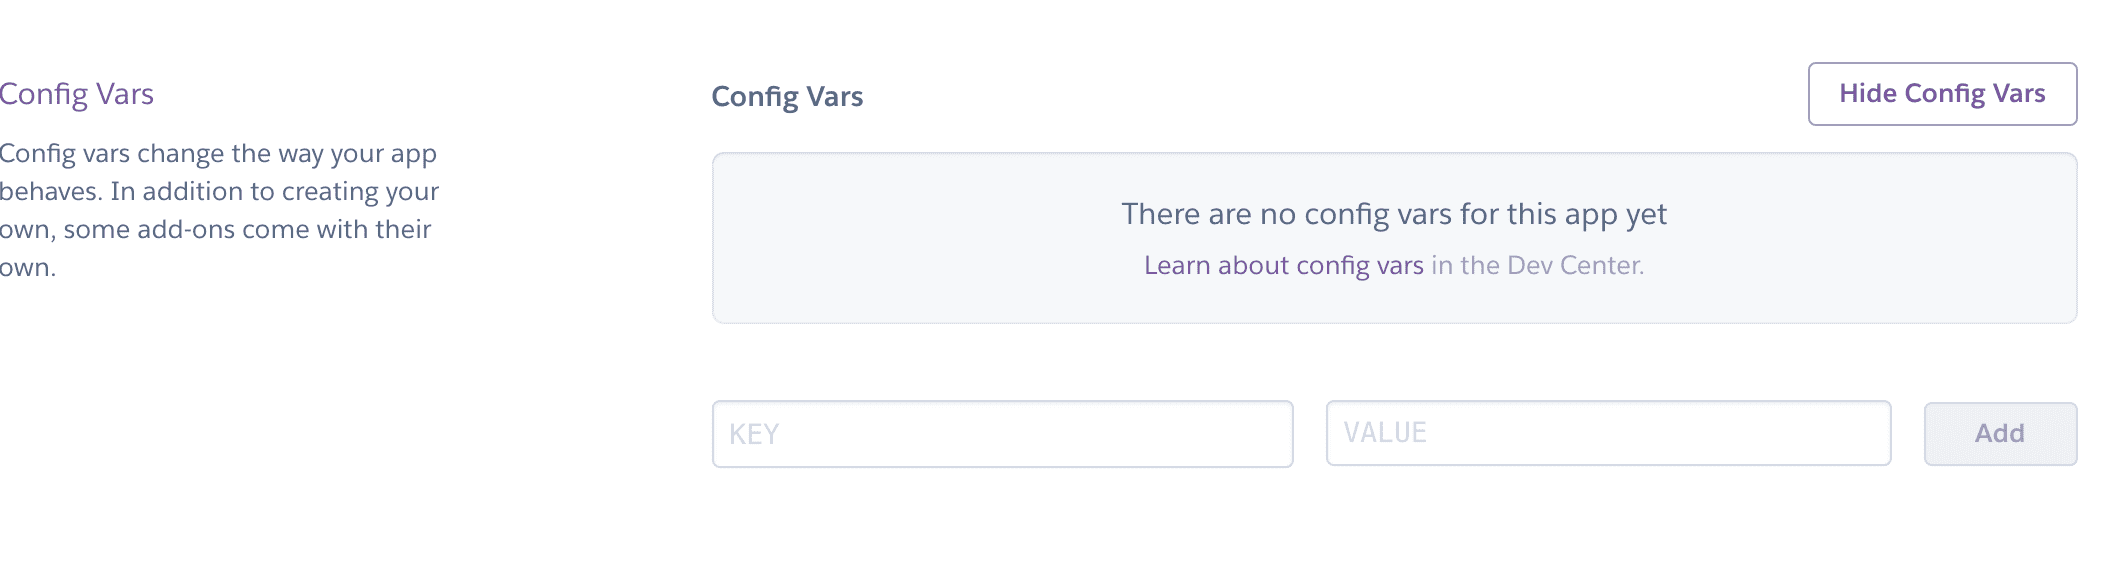
Now you can access at Stores | Now That’s Delicious!
44 - Deploying to Digital Ocean2
Create new git repo