- 1 - Creating Files with Touch
- 3 - Creating our Single and PhotoGrid components
- 4 - Setting Up React Router
- 5 - Creating our Redux Store
- 6 - Redux Actions
- 7 - Redux Reducers
- 8 - Integrating Store with React Router
- 9 - Understanding the Reducer’s Job and Dispatching Actions
- 10 - Accessing Dispatch and State with Redux
- 11 - Displaying Redux State inside our Components
- 12 - Updating State with Reducers
- 13 - Displaying the Single Photo Component
- 14 - Displaying & Adding Comments
- 15 - Updating Comment State in our Store
- 16 - Redux Reducer Composition
- 18 - Hot Reloading Redux Reducers with Webpack
- 19 - Learning Redux Dev Tools
Learn Redux Wes Bos
GitHub: https://github.com/anjagusev/Learn-Redux
Local repo: ~/repos/Learn-Redux-WesBos/learn-redux
Course Instructions:
Running
First
npm installto grab all the necessary dependencies.Then run
npm startand open <localhost:7770> in your browser.Production Build
Run
npm buildto create a distro folder and a bundle.js file.
1 - Creating Files with Touch
To create files from command line you can use touch command with multiple files like so:
touch Main.js PhotoGrid.js Single.js
3 - Creating our Single and PhotoGrid components
Main.js in the parent component, and the children are Single.js and PhotoGrid.js.
The switching out of the component is handled by React router.
What we would normally do is put {this.props.children}and that would be populated by React router into either Single or PhotoGrid but the gotcha that we have is that were not able to pass props that way.
Normally, if you had a <Single …this.props/> you could pass props that way, but we can’t do that when we use {this.props.children}.
Instead we are going to use `React.cloneElement(this.props.children, this.props)
{React.cloneElement(this.props.children, this.props)}
It is going to take any props that are coming from parent components and pass the along to the single or photo grid.
4 - Setting Up React Router
We added router object, and we will define a route path of “/“ for component Main.
const router = (
  <Router history={browserHistory}>
    <Route path="/" component={Main}>
      <IndexRoute></IndexRoute>
    </Route>
  </Router>
);
However, when we click through to a single photo, we are still using the main component, the only thing that gets changed is the child (the single or the photo grid component) so that is why we are going to nest the route ones in there.
IndexRoute = if we are just going to / in the url bar, what component should it render? Main!
<Route path=“/“ component={Main}>
	<IndexRoute component={PhotoGrid}></IndexRoute>
Parent route will match everything that is / and then if we go a level further, that means it’s a index route.
We add another nested Route
const router = (
  <Router history={browserHistory}>
    <Route path=“/“ component={Main}>
      <IndexRoute></IndexRoute>
    </Route>
  </Router>
);
Code above explained:
We tell it if it matches / or anything, grab the main component.
But then, depending on URL structure, either pass Main photo grid, or Main Single.
Single and PhotoGrid will be children of the main photo grid.
ANJATODO: look more into passing children in router
5 - Creating our Redux Store
Created store.js in main directory (not in components)
-we keep all of the data related to our application in the store -Rather than holding our state in a component state, we hold our state in a Redux store. We don’t have many different components with many different states, we have one giant object that contains all of our data for all of our store.
import {syncHistoryWithStore } from ‘react-router-redux’;
that will allow us to hook up react router with our redux
Although we imported browserHistory in our reduxstagram.js file and fed it to the router, in order to get us to connect the react-router and redux, we don’t just feed the router browserHistory directly, but we are going to slightly modify it in our store.js
Within store.js we imported {createStore, compose} from ‘redux’``{syncHistoryWithStore} from ‘react-router-redux’we imported to sync router with store{browserHistory} from react-router`
We imported the root reducer, and default data to pass to the createStore() method.
browserHistory keeps track of where you have gone when navigating back and forth
We are going to take the browserHistory and the push state and weave it in to the actual store.
6 - Redux Actions
An action: something that happens in your application (Someone adds a comment, likes a photo, deletes a comments, loads a page, someone clicks on a photo).
Whenever something happens in the application, we dispatch an action.
That action has two things in it, first type of action, and the second, a payload of information that is needed (information about what specifically happened).
You can use Redux Dev Tools to time travel by toggling on and off actions.
Action Creators -common practice is to create one action creator per file, but for this demo we will be using one file
In application, this functionality exists: increment likes, add comments, delete comments.
There is also changing of the Route.
//increment
function increment(index) {
  return {
    type: ‘INCREMENT_LIKES’,
    index
  };
}
For addComment functionality, we need to pass in more than just the index because we ned to know which post was commented on, who commented, and the actual comment itself.
We call them action creators because they return the actual actions (type and payload).
We need to export each Action Creator.
7 - Redux Reducers
Actions get dispatched with information about what happened. However actions alone don’t update state (the store)
We need to create a reducer on the other end to handle and update the actual state.
Actions can be thought of as regular javascript events that get fired off, but if you are not listening to the event, nothing happens.
We need to create a reducer to handle the data for that.
We create a reducer for every piece of state. Right now our default state is posts and comments. When posts get updated, we run the postReducer. When the comments are modified, the commentsReducer runs.
A reducer takes two things:
- The action (info about what happened)
- Copy of the current state
We take in information about the state and the action, and we return a new updated state and React will update everything accordingly.
function posts(state = [], action) {
}
Why did we do state=[] ? Because the first time that function posts() runs, state is not going to be equal to anything, so we are going to set it to be an empty array.
One thing about Redux is that we can only really have one reducer. We need to put our comments.js and posts.js reducers into a rootReducer for us to use it.
We make a reducer for each part of state and then we put them into one big reducer and it can handle it from there.
Create reducers/index.js file
import { combineReducers } from ‘redux’;
import { routerReducer } from ‘react-router-redux’;

import comments from ‘./comments’;
import posts from ‘./posts’;
To combine them we use:
const rootReducer = combineReducers({ posts, comments, routing: routerReducer });
We need routerReducer because really we have 3 things that live in state, posts, comments and changes in URLs (those will be logged in redux as well)
8 - Integrating Store with React Router
We need to modify our router to know about the store.
Go to reduxstagram.js
Import Provider from ‘react-redux’ which is essentially the binder that allows us to use redux with React.
How do we dispatch actions now?
We need to modify the router in reduxstagram.js
We add a <Provider></Provider> which exposes the store to our actual application. (Wrap the entire router in the Provider.js tag)
The Provider tag gets a store prop.
<Provider store={store}>
We also need to modify browserHistory in the Router tag and replace it with history which we imported from our store.
9 - Understanding the Reducer’s Job and Dispatching Actions
How do we hook up the actions and the reducers?
We dispatch an action and the posts reducer will be listening for that and it will handle that action.
You can manually dispatch an action in the console

Every time that you dispatch an action, every single reducer is going to run, and whether you choose to act on that action or not is up to the reducer.
We need to run some logic inside of the post reducer to say if it’s one of the actions I am interested in, then do something, otherwise return state and don’t change anything.
10 - Accessing Dispatch and State with Redux
How do we get the state to go into Main. In regular React, we pass it down as props. With Redux we have connect however.
Connect allows us to inject that data at whatever level we actually need it. And then we can pass it down or if it’s a couple of levels deeper we can connect it at whatever level we actually need the data.
We are connecting the data into the component that we need, and we also need to make the action creators fire. How do we expose those functions to buttons and how do we expose the actual data to our component? That’s where react connect will come in.
Main.js is a presentational component.
We are going to take the presentational component and infuse it with both the action creators and data by creating a second component that will sprinkle that on top.
Create App.js and import bindActionCreatorsfrom redux, connect from react-redux , actionCreators that we created and the Main component.
To actually create our App component, instead of React.createClass() we connect instead. It takes two things, first mapStateToProps, and mapDispatchToProps. They are two functions which will take the state and the dispatch which is our action creators and surface those data and the functions via props.
const App = connect(mapStateToProps, mapDispatchToProps);
function mapStateToProps(state){
return{
posts: state.posts,
comments: state.comments
}
This makes them available as props I believe?
function mapDispatchToProps(dispatch){
return bindActionCreators(actionCreators, dispatch);
}
That will pass us the action creators via props.
Those two functions do the magic and surface that data and functions via the components.
Next, we go back to reduxstagram.js file and swap the {Main} component, we will swap it with the App component (because we import the Main component WITHIN App.
In App.js make one more modification to include:
const App = connect(
  mapStateToProps,
  mapDispatchToProps
)(Main);
You can immediately call connect against Main and that will take our regular Main component, and it will add all of the props and data from state to props, and action creators to props.
11 - Displaying Redux State inside our Components
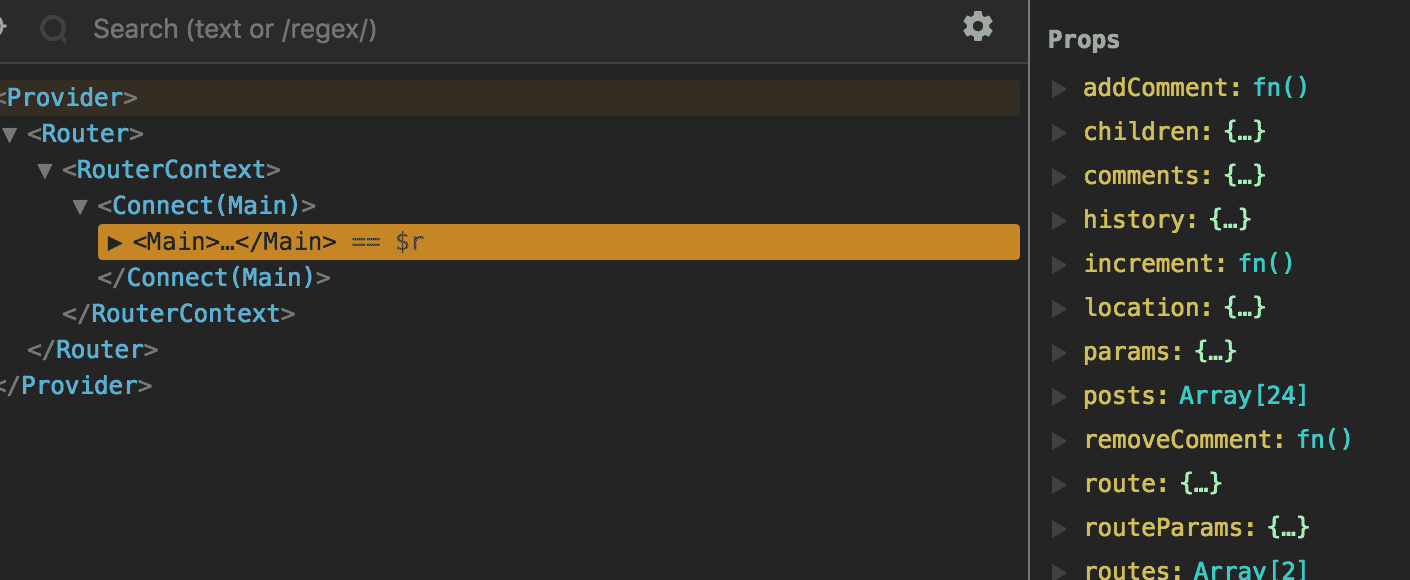
If you look @ <PhotoGrid> in the React dev tools, you see it also has access to the posts/comments and all things and methods.
The reason why is previously when we created the Main component, we did React.cloneElement() and it passes the props down from Main to the first child (which is PhotoGrid).
{JSON.stringify(this.props.posts, null, ‘ ‘)} <- shows all the data from the posts in state.
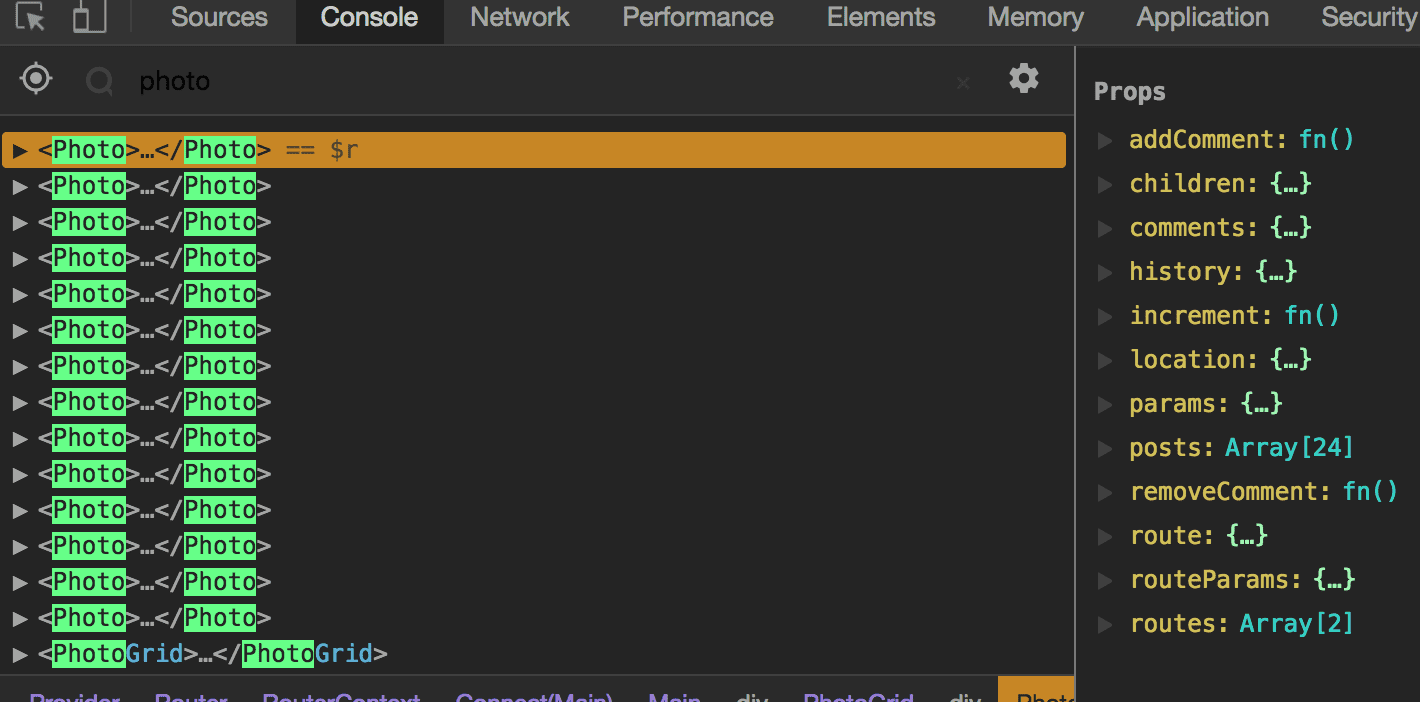
We create a Photo component and in PhotoGrid we map over all the posts and pass props to Photo.
<Photo {…this.props} /> <- es6 spread to pass all props
Now we have access to all the props:
(Error message about each child needing unique key is solved like so:
<Photo {…this.props} key={i} I={i} /> <- key is not accessible, part of react. Need to pass another value for index which we can use.
12 - Updating State with Reducers
When someone clicks on like button, we want the increment function to run.
Add onClick to button. The code below is incorrect because increment() will run on page load. So how do we pass a argument to it?
<button className=“likes” onClick={this.props.increment(i)}>♥ {post.likes}</button>
There are a few ways to do it. One is to call .bind and pass in null as the first one and then pass the first parameter as the second one.
<button className=“likes” onClick={this.props.increment.bind(null, i)}>♥ {post.likes}</button>
State should never be mutated. Make a copy, chance it, and then return the changed state.
For INCREMENT_LIKES reducer, we want to return all the posts, and only update one of them with the like. We could do array concat but we are using es6 spread.
…state.slice(0,i) <- the array up to the index of post we are updating
…state.slice(i +1) <- the array after the one we are updating
The one we are updating we want to take a copy of the actual object, the other ones are just references to the old ones, but since we are changing these ones we need to take a copy of the actual object.
{…state[I], likes: state[I].likes+1} <- very similar to Object.Assign where it will take a copy of the element, and then returns an array.
13 - Displaying the Single Photo Component
We will reuse the photo component for the Single.js component and just add the comment section.
Within the component we need the index and the post.
To get the index we use part of the url to find the id of the post and match it from the array
const I = this.props.posts.findIndex(
      (post) => post.code === this.props.params.postId
    );
14 - Displaying & Adding Comments
In the Single component we have access to the comments so we can pass them down to the comment component via props.
In single, grab the current comment using
const postComments = this.props.comments[postId] || []; <- this will grab the comment or if there is no comment, assign it to an empty array.
Pass it to the Comments component as props: <Comments postComments={postComments}>
Now in the Comments component, we will create another render() method to render an individual component.
const Comments = React.createClass({
  renderComment(comment, i) { //the i is being supplied by the map function
    return (
      <div className="comment" key={i}>
        <p>
          <strong>{comment.user}</strong>
        </p>
      </div>
    );
  },
  render() {
    return (
      <div className="comment">
        {this.props.postComments.map(this.renderComment)}
      </div>
    );
  }
Next we added the actual comment, the remove button and also a form to submit next comments
15 - Updating Comment State in our Store
Whenever we submit a comment, the page reloads. That is because the form isn’t hooked up to anything.
We need to get the text out of the inputs, and that is why we put the refs on the form elements. When you need to reference a dom element you need a ref and in react you usually don’t need to access a dom element but if you do, one way you can do that is with a ref.
We need to get the postId from the params to handle the submitting of the comment. Then grab the values from the inputs by accessing the refs inside of handleSubmit.
    const author = this.refs.author.value;
    const comment = this.refs.comment.value;
    console.log(author, comment, postId);
Now we have to actually do something with those values, aka use the reducer.
16 - Redux Reducer Composition
Comment data is a big object where each of the items is a key for the associated post, and inside of there is the array of comments for that post.
When we want to add a comment, we don’t need to update the entire comment state, we just need to update the one individual posts comments.
Just as we split up state into two pieces, posts and comments, and we had a reducer for each of them.
We are going to make another sub reducer to handle the updating of just one of the posts. This is called reducer composition. We pass the reducer just a splice of state to manage and it knows to update just that slice.
Within reducers/comments.js we are going to create another function called postComments which will just handle the individual post’s comments.
Within the comments function, we check whether the post item is there by checking if action has typeof postId undefined. If it doesn’t have postId, return the state.
If it does have a postId, we will pass a portion of the state to postComments to be managed . We do this by taking a copy of the state, and then overwriting the post with a new one. We will shell that work off of taking the comment onto the array to the postComments function.
function comments(state = [], action) {
  if (typeof action.postId !== ‘undefined’) {
    return {
      //take the current state
      …state,
      [action.postId]: postComments(state[action.postId], action)
      //overwrite this post with a new one
    };
  }
  return state;
}
[action.postId]: postComments(state[action.postId], action)
We put it in square brackets so the key can be a variable.
We want to pass in a subset of state, and pass the entire action. It is saying basically some other function needs to take care of that individual one, I am just returning the comments state.
In postComments, we need state to be an array. We take the existing comments and apply them to the new array and tack on another comment.
case 'ADD_COMMENT':
      //we need to return existing state plus the new comment
      return [...state, { user: action.author, text: action.comment }];
In postComments added the following switch statement:
  case ‘REMOVE_COMMENT’:
      //need to return without the deleted column
      return [
        //from the start to the one we want to delete
        …state.slice(0, action.i),
        //after the deleted one, to the end
        …state.slice(action.i + 1)
      ];
18 - Hot Reloading Redux Reducers with Webpack
You open store.js and you have to accept the hot reload and re-require the reducer. That will recompile the root reducer and swap it out inside of the store without us having to refresh.
We check if the module is hot, then we accept it, and then we run a function that is going to re-require and swap out the module for us.
Grab it, and we use require because you cannot use es6 import statement inside of a function (it must be done at the top of the function).
We will require the main reducers (reducers/index.js)
if (module.hot) {
  module.hot.accept(‘./reducers/‘, () => {
    const nextRootReducer = require(‘./reducers/index’).default;
    store.replaceReducer(nextRootReducer);
  });
}
19 - Learning Redux Dev Tools
How do we install it? Use a store enhancer, which allows us to add things to our store using Redux devtools.
If you go to Redux dev tools, it will take you to an instruction page.
We will create enhancers like so:
const enhancers = compose(
  window.devToolsExtension ? window.devToolsExtension() : (f) => f
);
Add it to the store
const store = createStore(rootReducer, defaultState, enhancers);